
How Microsoft Power Platform is helping to modernize and enable...
In this webinar, our experts showcase a variety of demo use cases of how different components of the...
In today’s post – part of an ongoing series devoted to Business Central – we’ll delve into Dynamics 365 Business Central and its integration with Microsoft Outlook. To mimic the example we’ll be describing, note that users must have Super rights in Business Central, as well have email configured and an Exchange license assigned to them in the Microsoft 365 Admin Center.
Business Central introduces the ability to manage business interactions with customers and vendors directly in Microsoft Outlook. With the Business Central Outlook add-in, we can see financial data related to customers and vendors, as well as create and send financial documents like quotes and invoices.
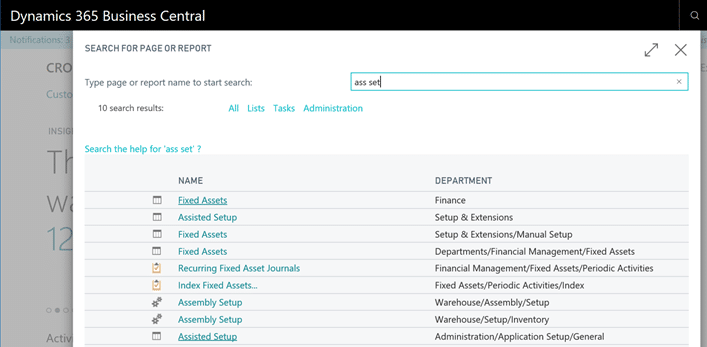
To install the add-in, we need to log into Dynamics 365 Business Central, and search for Assisted Setup, as shown below:
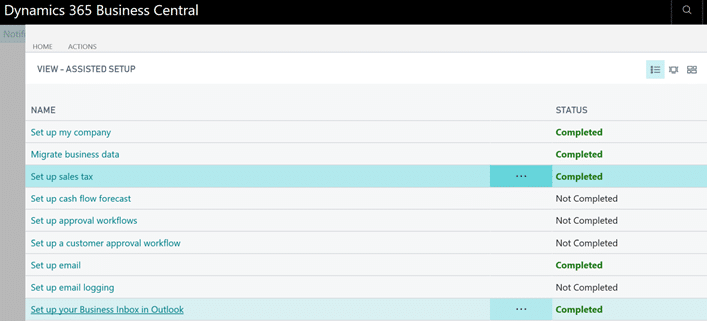
Click on it to open the ASSISTED SETUP view. From this view, click the option for Set up your Business Inbox in Outlook.
If you have already run this in the past, you will get a popup box asking if you want to reinstall or get a newer version of the add-in. Click Yes. Note that this is especially important if you installed the add-in before the Business Central upgrade.
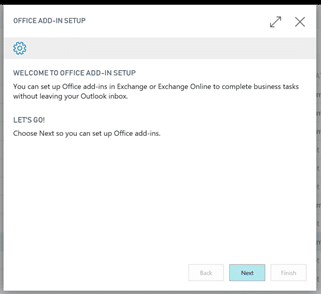
On the OFFICE ADD-IN SETUP page, click Next.
On the following page, select My Mailbox to install the add-in in your Outlook client only; select My Organization to install it for every Outlook client in your organization. Click Next.

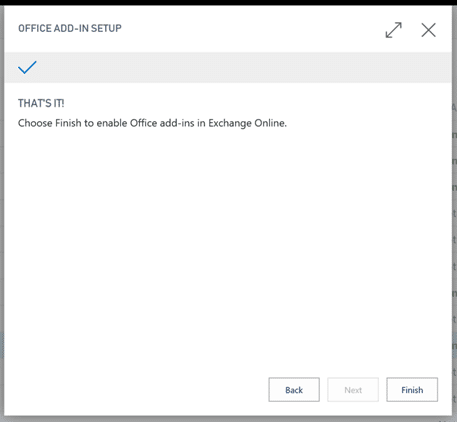
On the next screen, you have the option of receiving a test e-mail. This is optional. Click Next. Click Finish.
You may have to restart Outlook to see the new button, but the install is done in the background, and it will eventually look like this:

Adding the Add-ins Manually
In some cases, the add-ins do not get added automatically to Outlook. Even if we ran the assisted setup guide on behalf of the company, Business Central might not show up in Outlook. If we experience this issue, we can add the Business Central add-ins manually.
First, we must verify that we have access to the add-ins in our Office 365 account. This is quite simply open our Outlook Web Access in a browser, and then add /owa/#path=/options/manageapps to the URL in the address bar. This opens the Manage add-ins page, where we can enable Business Central for Outlook. Then, when we navigate back to Outlook, Business Central should be available.
Similarly, in the Outlook desktop client, we can verify that Business Central is listed on the Manage Add-ins page.
Stay tuned for more blogs about Business Central and don't forget to subscribe. As always, Happy Dynamics 365’ing!


