
How Microsoft Power Platform is helping to modernize and enable...
In this webinar, our experts showcase a variety of demo use cases of how different components of the...
Dashboards are possibly the most eye-catching feature of CRM 2011. Like the Mary Poppins's song, candy colored charts distill information into an easy-to-swallow form making analytics a snap. But Dashboards don't stop at charts. A personal dashboard in RM 2011 allows a user to compile data they need from all over CRM into one place – a command center of sorts. And most importantly, Dashboards can be tailored to fit every user's unique needs.
Got a favorite customer you want to keep an eye on or an industry blog you follow? Put it in an IFRAME on your Dashboard. You'll never miss a hot news item again!
Need to quick view of all the activities and appointments due today? Create an advanced find to narrow down your activities list to today's items and display it on your Dashboard.
Let's get started!
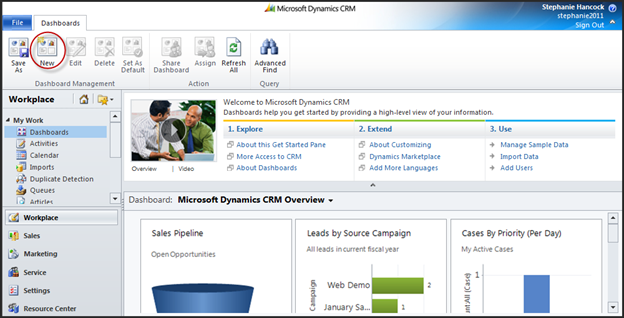
When a user logs into CRM, the out-of-the-box landing page is on Dashboards. Creating a new one is as simple as pressing the New button on the ribbon. This will allow the user to select a standard layout for a starting point of their personal Dashboard. For this example, I am creating a dashboard relevant to a sales person. I'm using the 3-Column Multi-Focused Dashboard as a starting point and will modify the layout from there.
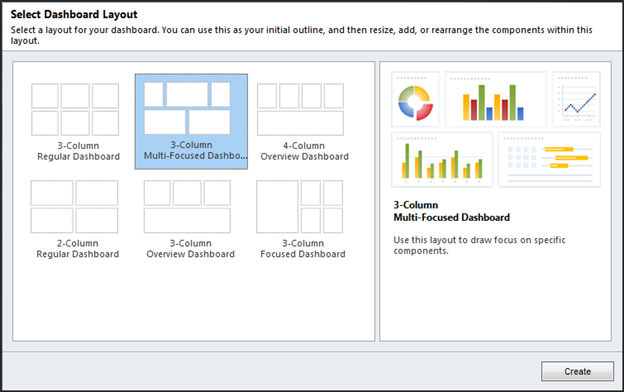
Once the template is selected, press the Create button and CRM will open a full sized empty template for the user to begin customizing. Title the Dashboard and select the first box.
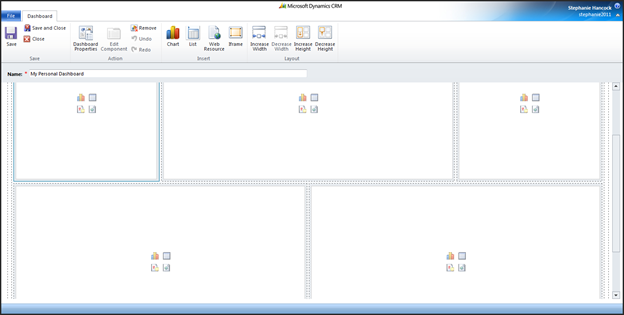
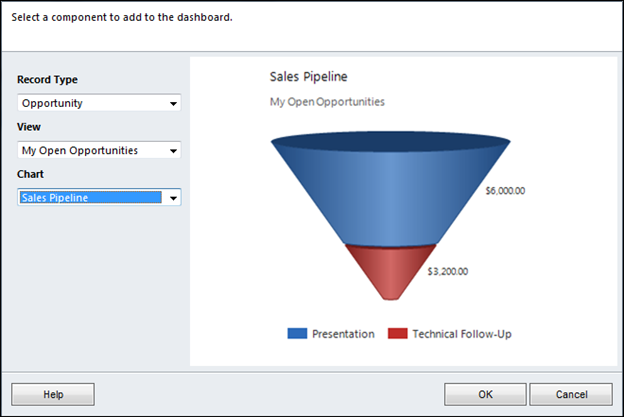
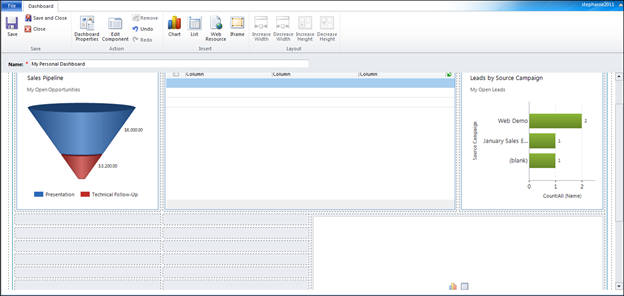
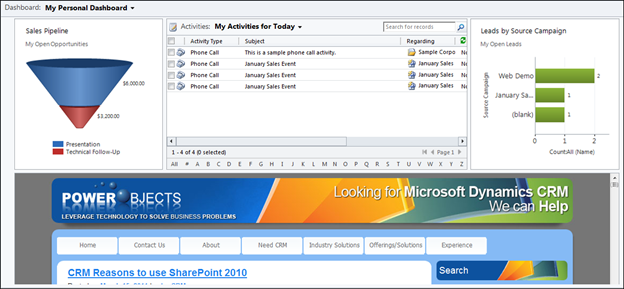
The items that I want in my personal Dashboard are: a graph of my pipeline, a graph of my leads, a list of the activities I have scheduled for today, and a blog I follow so that I can see any new posts when they happen. To add those, I click on the first section of my Dashboard and then click on the  Chart button. CRM will display a dialog box will that allows me to select the exact chart I want. Each record type has multiple views and charts to choose from in the pull-down menus.
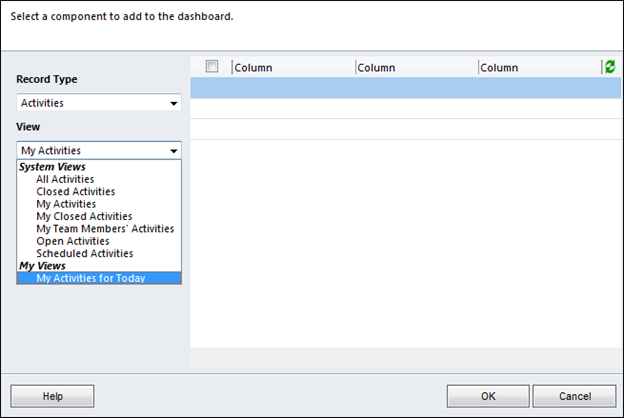
When I press OK, the chart is inserted into the Dashboard. I can then choose the widest box in the middle of the Dashboard template and click on the  List button to insert the list I want. CRM 2011 will allow any system view or user owned view to be inserted as a list. For my Dashboard, I want to display a saved view that filters my activities to the ones I have scheduled for today.
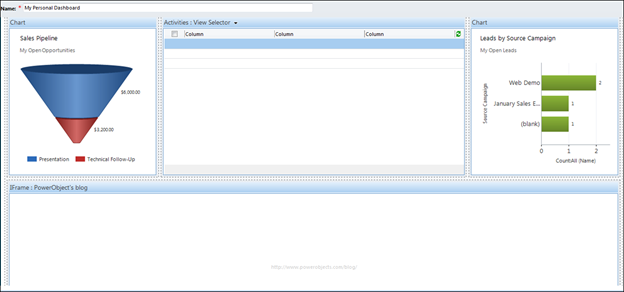
Following the same pattern, I can insert a chart of Leads by Source Campaign into the final box on the top row. For the bottom row, I want one box that stretches across the entire Dashboard allowing me to see my favorite blog. In order to accomplish this, I need to delete one of the two boxes and enlarge the remaining one. To delete a box, select it then press the  Remove button in the ribbon. The template will now look something like this.
Next select the remaining box and enlarge it by pressing the  Increase Width button until it takes up the entire bottom row. If necessary, the height can also be increased. (The button will be grayed out until a section is selected.) Next press the
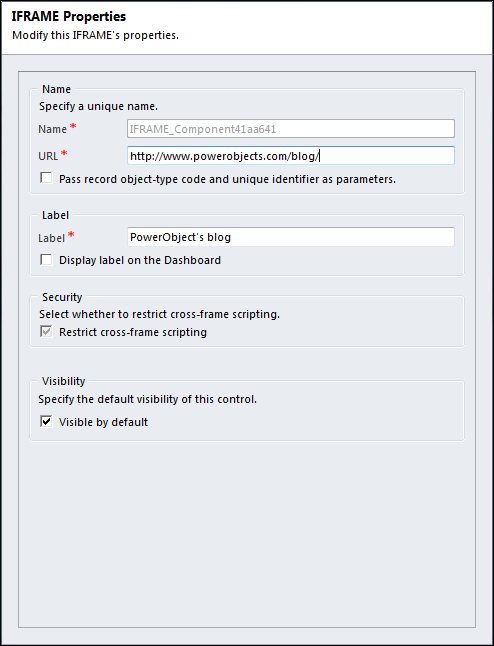
  IFrame button to add the URL to the IFRAME dialog box. (It may be helpful to have the URL in your safe sites list.) Save the IFrame to insert it into your Dashboard.
When the Dashboard in Edit mode, the different sections may not display the data. It's nothing to be alarmed by.
Save and Close Edit mode and select the new Dashboard from the pull-down menu.
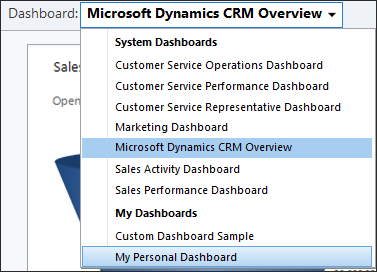
To make the new Dashboard the default, be sure to press the  Set As Default button on the ribbon while the new Dashboard is displayed. By exploring the graphs further and you will notice three icons in the right corner:
  Refresh the chart,
  View the records that generate the chart and
  Enlarge the chart. By clicking on the
  View button, you can drill down to explore the individual items more thoroughly.
With personalized Dashboards in CRM 2011, it's easy to combine elements to give you an overview of everything you have going on in a day. Instead of wasting time looking for information, everything is presented in one page freeing you up to act on the data.
Happy CRM'ing!


Is there a way to take the user directly to the Dashboard? Currently must navigate down the Site Map a few clicks to get to it.
Yes!
Under the personalization Options, each individual user can specify wich Workspace and Link they want CRM to default to when opened.
Then, for Dashboards, on the Ribbon you can specify any one of your dashboards as the default one.
Those 2 actions will give you exactly what you want.
-Robert
Great article. I'd like to see an article about how to obtain the URL for a Personal View because I can't figure it out using F12 or any other way. I've created multiple personal views for leadership and would like to present the URLs via a series of SharePoint WebParts on one single portal page.
Pull up the view in CRM, then on the ribbon menu, click the down arrow next to "Copy a Link" then select "OF Current View". This will copy the URL of the personal view to your clipboard.
I've added a chart based on a report to my dashboard and shared the dashboard with others and now it says they do not have enough privledges to view it. But I can see it fine. Both the report and the dashboard are shared and I don't see a way to share my chart. Any thoughts on how I can get others to view it?