In today's blog, we'll be showing you how to configure toolbar buttons in Unified Service Desk, aka USD. But first, if you haven't already, check out our previous blog to ensure that you already have the basic hosted controls required for Unified Service Desk.
Now, on to the good stuff! There are three different button types that you can create in USD, each with a unique end user experience:
- Regular Button: Upon click of the toolbar button, USD performs some action.
- Dropdown Button: Upon click of the toolbar button, USD provides the user with additional drop down buttons. Upon click of each of these buttons, USD performs some action.
- Split Button: This button is a combination of a regular button and a dropdown. Upon click of the toolbar button, USD performs some action. Upon click of the arrow offered, USD provides the user with additional drop down buttons, each which perform some action.
When eliciting requirements from your end users, consider their most common actions or a common action with a few variants. Make sure you understand if they need this action generally or only within a session. If the latter, consider placing the needed actions in an agent script or as a session application tab toolbar.
Remember, when dealing with toolbars and toolbar buttons, the order assigned will determine the layout from left to right (on a toolbar) or top to bottom (on a dropdown or split button). It is best practice to space out the order numbering so that if business requirements change or increase you have space in the order to rearrange the order or add.
In order to properly configure these three button types, you will utilize basic CRM creation of records and association of related records.
How to Configure Each End User Experience
First, to accomplish a regular button, associate action calls to a button, but do NOT create any associated buttons. In the example below, we can expect that upon click of this button, we will be presented with a contact search.
1. Name your toolbar button a commonsense name, this will be for administrators or customizers only.
2. Include the actual button text that will display. Add a tooltip if desired.
3. Think big about all the buttons you currently want (and will want). It is best practice to space out your numbering in case you determine you want to make adjustments or the business requirements increase to include previously unknown buttons.
4. Buttons are able to change the tab in focus. Select the hosted control to bring to focus for the end user upon click of the button. Don't forget to any additional actions required to achieve your desired end result.
5. Create new or add existing action calls. Here we have associated an action call which asks USD to perform a Find function (UII action) and passed it the contact entity (data parameter).

Since buttons are already associated to toolbars, you do not need to add each button to the configuration.
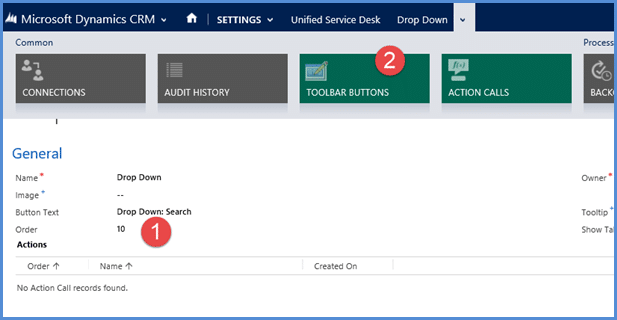
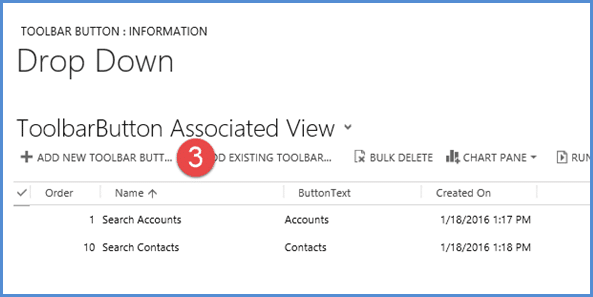
Secondly, to accomplish a dropdown button, associate additional buttons to the button that will display on the toolbar. Do NOT associate any action calls to the button that will display. In the example below, we can expect that upon click of the dropdown button, we will be given an option to complete an account or contact search.
1. Create a new button and populate the order. Consider your order in relation to all other desired buttons, taking care to follow best practice of spacing out your order sequence.
2. Select the associated toolbar buttons entity.
3. Add all of the associated buttons as desired. Be sure to consider the top to bottom order you'd like them to appear in the drop down.
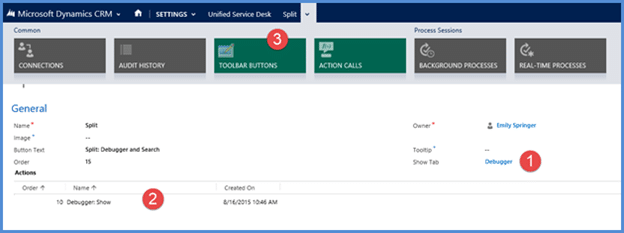
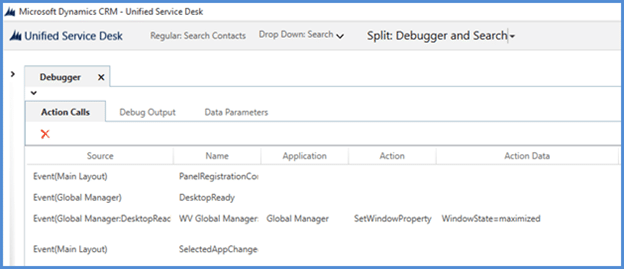
Third, to accomplish a split button, associate actions call to the button that will display on the toolbar AND associate buttons to the button that will display. In the example below, we can expect that upon click of the split button, the debugger will populate in the MainPanel, or we can access either an account or contact search as a drop down. Note that the debugger is not used in production environments and is not commonly seen by end users. This example was selected because the debugger is a common hosted control that is configured early on when learning USD and thus reduces preparation if you wanted to follow along exactly as outlined.
1. Determine which tab the focus should move to upon click of the displayed button.
2. Associate any needed action calls.
3. Access the ToolbarButton Associated View.
4. Associate buttons to the main display button. Don't forget to associate needed actions calls to the associated buttons!
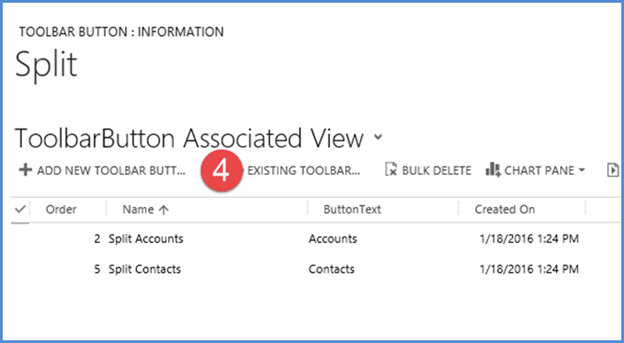
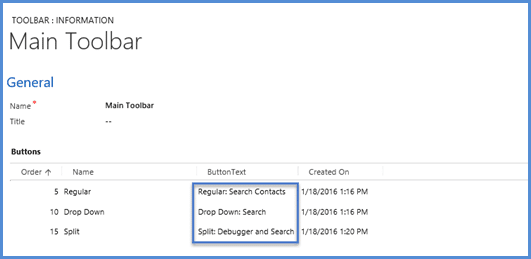
This is our final product from a configuration perspective:
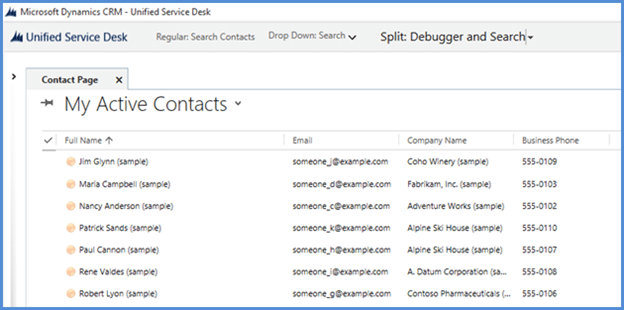
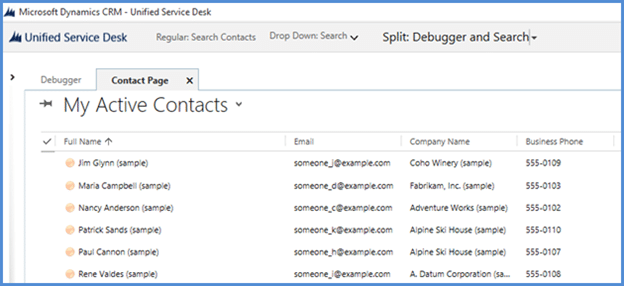
This is our final product from an end user perspective: Upon click of "Regular: Search Contacts."
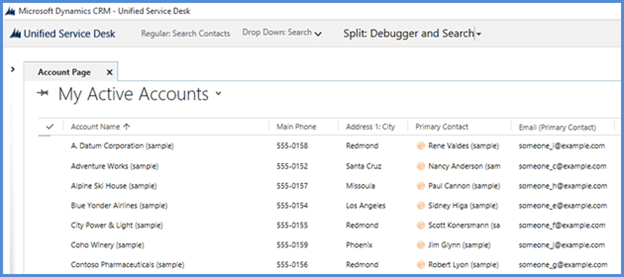
Upon click of "Drop Down: Search" (click on arrow not needed) and further selection of Account.
Upon click of "Split: Debugger and Search."
Upon click of the arrow on "Split: Debugger and Search" button and further selection of Contacts.
If you do not achieve the following results, please troubleshoot using the following questions: Are each of the needed records in the configuration? Have I assigned my user a USD configuration? Is the toolbar associated to the toolbar container? And does each button, with the exception of the dropdown button, have an action associated with it?
Happy streamlining of your CRM solution in USD!
 How Microsoft Power Platform is helping to modernize and enable...
 Deliver an Extraordinary Omnichannel Experience
 Data Interoperability Key to Improving the Patient Experience


