The PowerMap add-on for Microsoft Dynamics CRM has some fun new tools for 2013, and we are bursting at the seams to introduce you to the fancy features. Come along as we walk you through a scenario that will help acquaint you with the new and improved PowerMap 2013!
Let's say you're a sales rep in Saint Paul, MN and you are looking to reach out to your active accounts in your CRM. You want to provide some great customer follow-up by providing a little face-to-face contact, promotional items, and a list of your current services and specials you are running.
-
First, let's take a look at the current active accounts in PowerMap in your area. Start by zooming PowerMap into your state.
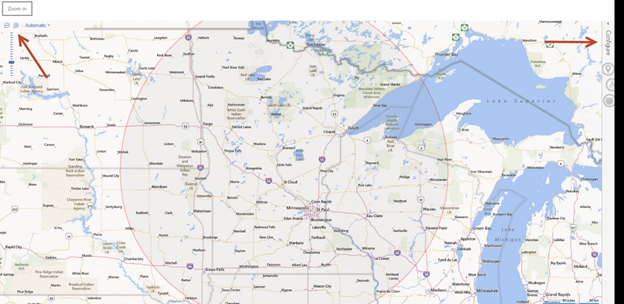
- On the right side of the screen, there is a vertical tab labeled Configure. Pop that open by clicking on it. You can establish your PowerMap criteria by selecting your entity from the drop down menu. Choose between the entities that you chose PowerMap to keep track of. It could be your leads, contacts, accounts, and so on. In this case, we're going to select Accounts.
-
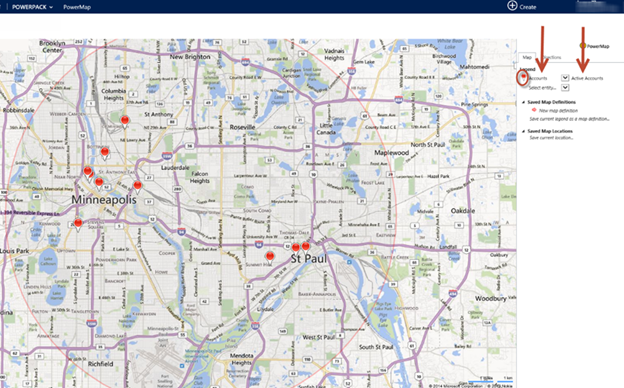
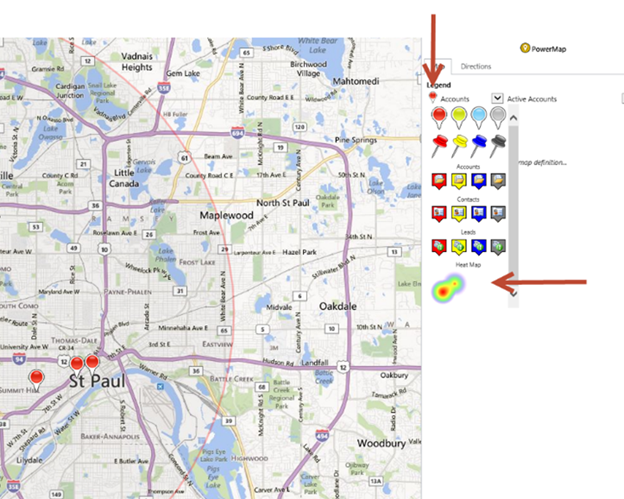
If you click on the red pin symbol next to the accounts selection, a drop-down menu will appear where you can choose how you want your accounts displayed. Let's choose the new Heat Map option at the bottom of the list to indicate which area by to your office has the most active leads!
-
To the right of the Accounts drop-down should be another drop-down menu. This is where you can specify accounts, contacts, leads, or whatever else you are interesting in mapping. In this case, let's choose Active Accounts.
-
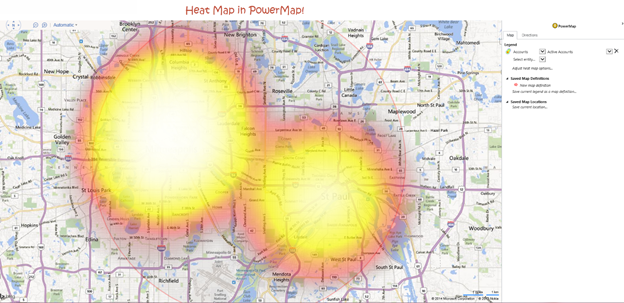
As you can see here, the map has populated two major heat bubbles! The more active accounts in one area, the brighter the heat bubble will become. It looks here that you can hit more active accounts if you make your way over to Minneapolis.
-
Before heading over the river to Minneapolis, let's add the Saint Paul and Minneapolis clients to marketing lists. Start by switching the heat map back to a normal pin by clicking the heat icon next to Accounts in the Configure pane under Legend.
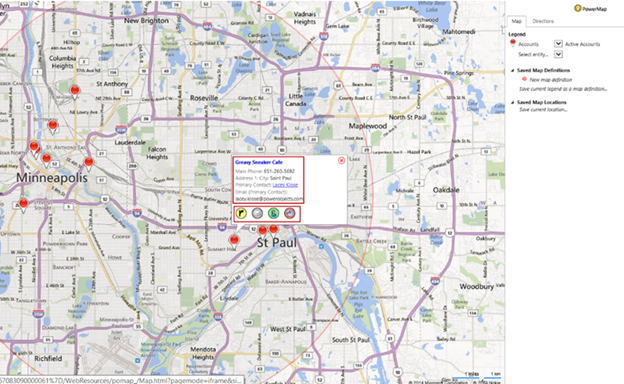
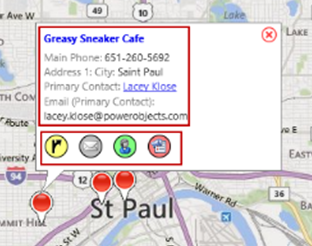
- Once you have made the change, click on one of the client's pins. The box that pops up will allow you to get a snapshot of information on your customer, such as business contact name, address, and phone number. You can also click on the business name to access that record in CRM.
-
On the bottom of the pop up, you will notice four bubbles. The first (starting on the left) is for step-by-step directions, which we will demonstrate next. The second is email, to be used when wanting to reach out to clients in a specific area. Third you can assign records--if territories change, you can use PowerMap to easily identify and modify who is assigned to who. Finally is the marketing list bubble, which can help organize clients by location to help with regional marketing strategies.
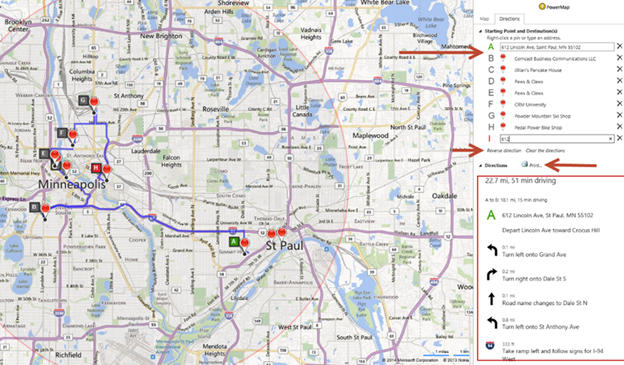
- Step-by-step directions help make your client endeavor more convenient. Instead of popping between CRM and web browser, everything can be mapped within CRM! Start by clicking on the client's pin that you want to visit first and selecting the yellow directions button in the pop-up window. In the Configure pane on the right hand side of your screen, you will notice that it has populated that client's address. This allows you to either manually enter an address or choose another pin on your PowerMap to continue your journey. You can add as many destinations you want. Just continue clicking on pins or entering your addresses in manually. When you are finished creating your route, use the print button between the entered addresses and the step-by-step directions. This will allow you to take your customized route with you!
So there you have it! PowerMap has now become your one stop shop to help get a visualization of which clients are in what areas, what the best route to travel to your clients will be, how to email clients in a specific area, how to re-assign or assign clients in a certain region, and how to make marketing lists with customers, leads, or accounts by area. What more could you ask for?
Happy mapping and CRM'ing!


