
How Microsoft Power Platform is helping to modernize and enable...
In this webinar, our experts showcase a variety of demo use cases of how different components of the...
Microsoft Dynamics Marketing is a great tool that helps you maximize your marketing efforts within Dynamics CRM. In today's blog, we are going to give you two handy tips for using MDM: how to create job templates within MDM and how to manage your social media with MDM. It's marketing madness today! Let's begin!
How to Create Job Templates in Dynamics Marketing
Organizations often need to manage routine jobs and the tasks associated with completing those jobs. The jobs and tasks are often the same, but the individual who is assigned to complete the task could be different based on their availability at the time.
You can manage these types of routine jobs and task assignments through Microsoft Dynamics Marketing by using Job Templates and Virtual Teams.
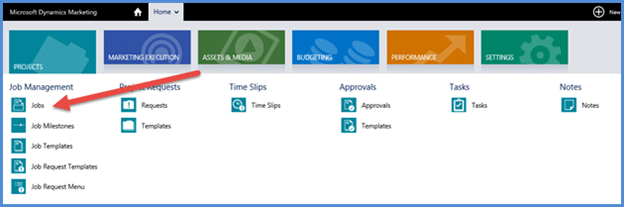
1. To create a new Job Template, first navigate to the Projects tile, then click on Job Templates.
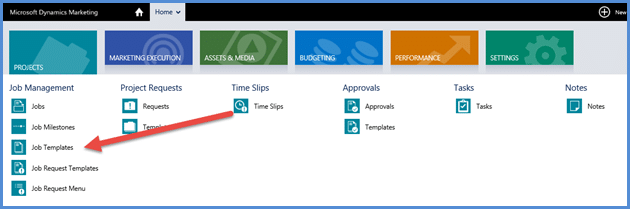
This is the main page for Job Templates. Here you will find all of the Job Templates currently in the system.
2. Create a new Job Template by clicking the + button in the upper right hand corner of the page.
3. On the Job Template creation form, specify the required fields to get the Job Template started. Set the status to In Process, create a name for the Job, and select the Company, Start Date, Due Date, and any additional information to help identify the Job.
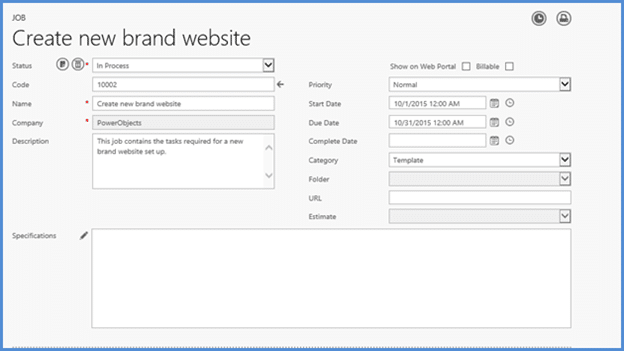
4. After you complete all of the required fields, click Save at the bottom of the screen. Notice that below the Specifications text box, there is a dotted line with the word Details underneath it. This is the entity selector dropdown. In the Details section, you can specify additional information about the Job. For example, if this Job is related to a marketing program, you can specify that here.
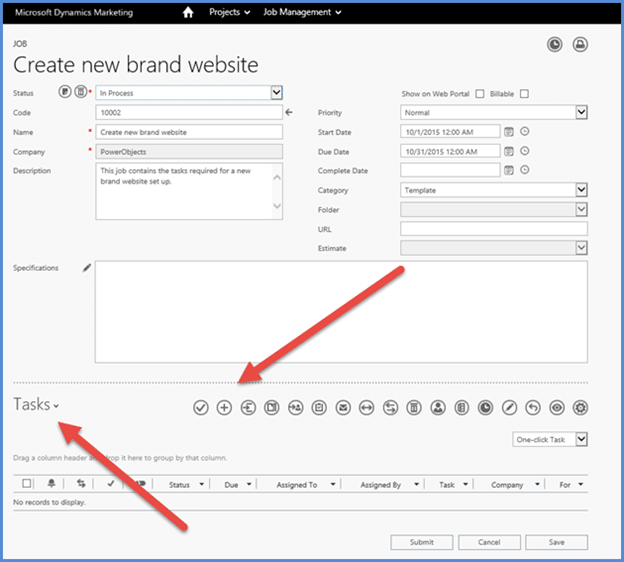
For now, click on the entity selector (Details dropdown) and select Tasks. To create a new Task, click on the + sign. A new screen will open and prompt you to set up the Task.
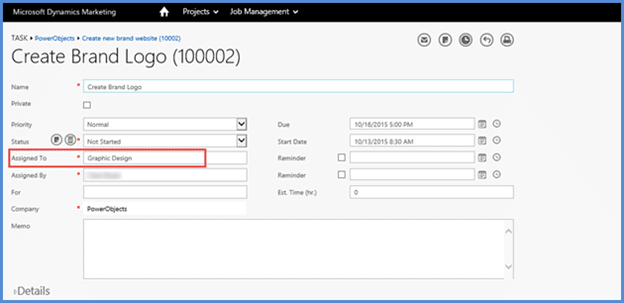
5. Specify a name for the Task. In this example, the Task is to create a brand logo for the website, so we created a name accordingly. Specify your required fields. Notice that in Assigned to, we've added the name of a Virtual Team called Graphic Design, rather than User. When we use this Job Template in the future, we'll be able to specify the User who is responsible for Tasks assigned to the Graphic Design Virtual Team.
Note: To set up Virtual Teams in Dynamics Marketing, navigate to Settings, My Company, and then Virtual Teams.
6. Now, save your Task and return to the Job Template form. Continue to add tasks until all of the required tasks to complete your job are entered into the Job Template.
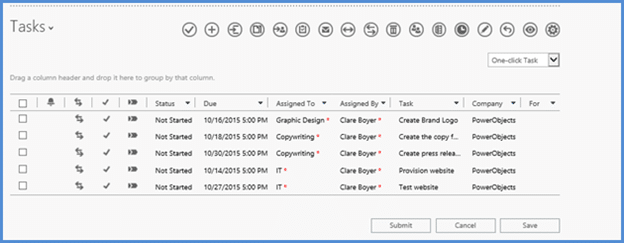
Now that all of our tasks have been entered, we need to specify the teams that are involved in this job.
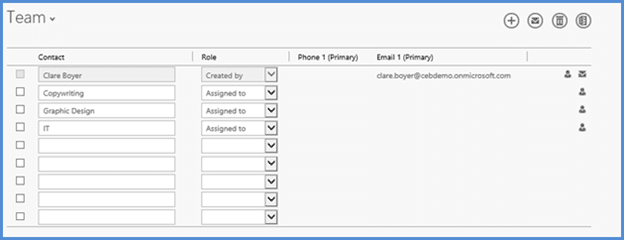
7. Click the entity selector and select Teams. Then we will add in the teams that we have included in our tasks and select Assigned to for each role, since we'll be assigning tasks to these teams. When the job is created, this is where we will go to select a specific contact to assign the tasks to for each team.
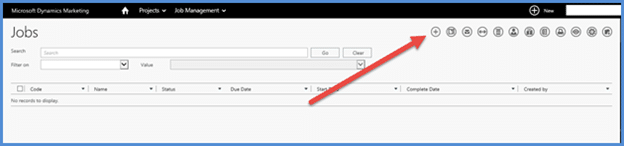
8. We are now ready to use the Job Template to create a job. Click Submit, then navigate to Projects and then Jobs. Click the + button to create a new job.
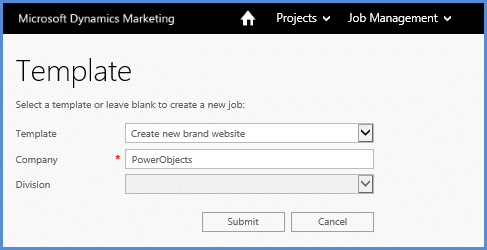
9. After clicking the + button to create a new job, Dynamics Marketing will prompt us to either create a new job or select from an existing Job Template. We're going to create the job using the Job Template that we just created. After selecting the Job Template, click Submit.
10. You will notice that the job form looks almost identical to the Job Template form. Edit the Start Date for the job and click Save. A pop-up notifies us that the job duration has changed. To adjust the dates for the tasks as well, click Shift job and task dates.

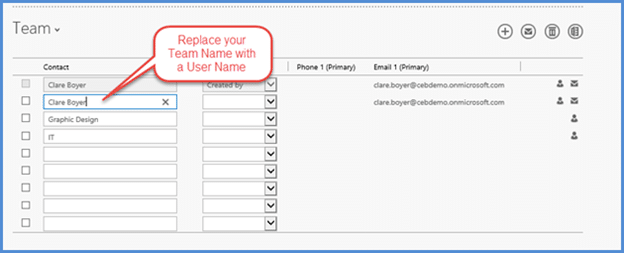
11. Now we're ready to assign the tasks to specific contacts in the system. Click the entity selector and select Teams.
12. Next, replace the Team Name with a Contact Name and click Save.
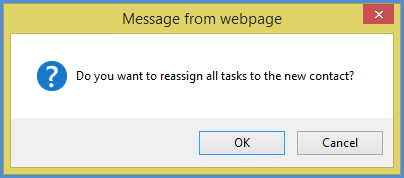
13. A message will ask whether we'd like to reassign all tasks to the new contact. Click OK.
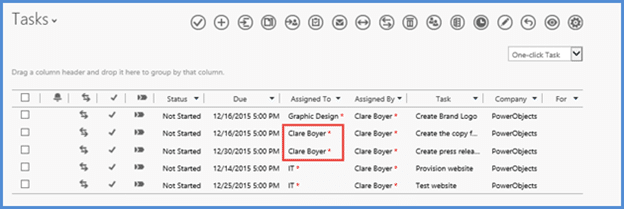
14. Click the entity selector and select tasks. Notice that the tasks that were previously assigned to the Copywriting team are now assigned to a contact.
That's it! As you can see, using Job Templates and Virtual Teams can be very helpful when assigning tasks to get routine jobs done!
Managing Social Media Accounts with Dynamics Marketing
Setting up your social media account is the first step to managing social media in Dynamics Marketing.
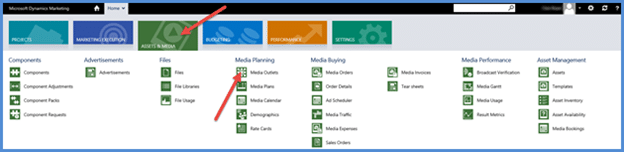
1. First, navigate to the Assets & Media tile in the main navigation and select Media Outlets.
2. Add a new Media Outlet by selecting the + icon at the top right hand corner of the screen. Notice the different types of media that you can manage within Dynamics Marketing. To manage a social media account, select Social Media and click Submit.

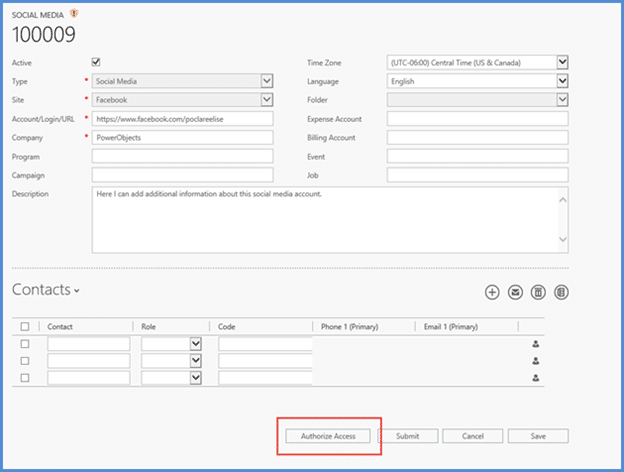
3. Specify Twitter or Facebook and the Account/Login/URL for the account.
If you have Programs or Campaigns that have their own social media account, you can specify those here as well. When you look at your Programs or Campaigns, you'll be able to toggle through the Social Media outlets that are related to the Program or Campaign. You can also include an expense and billing account, events or jobs.
4. When you have completed entering the information, click Save, click Authorize Access, and follow the prompts by the social media network to access the account.
Now that we have authorized access on our social media account, we can begin posting to it from Dynamics Marketing.
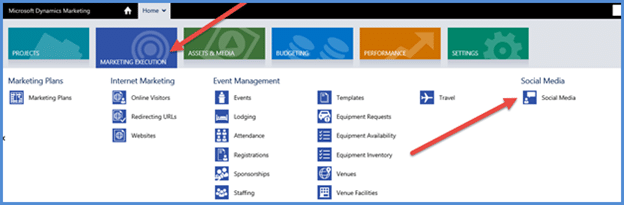
5. To create a social media post, navigate to the Marketing Execution tile, select Social Media, and click Social Media.
6. On the main screen for Social Media Messages, click the New button in the upper right hand corner.

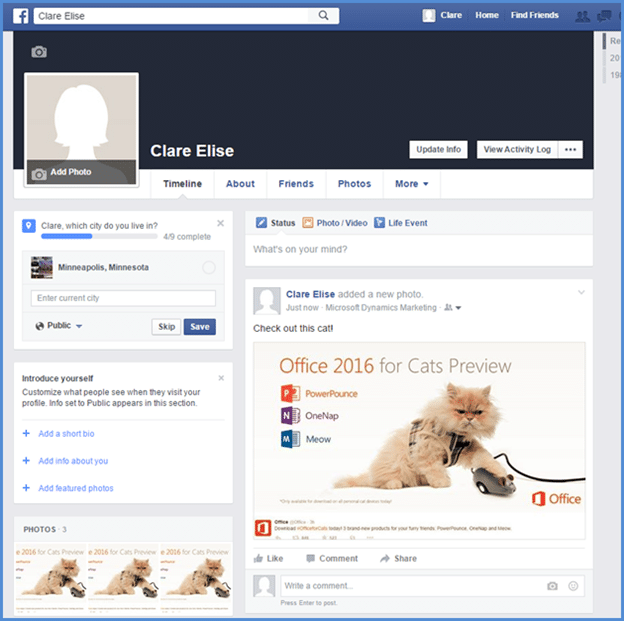
7. Now you're ready to compose your post or tweet. Select whether you want to send the post now or at a specified time in the future, and check which site you'd like to post to. Enter your post in the large text box and specify hashtags, tags and links within the message. You can also upload a photo or video by clicking the upload icon.
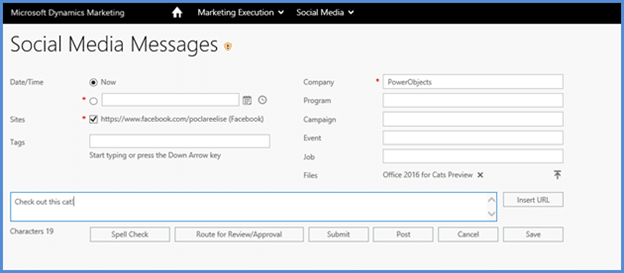
8. When you have finished composing your message, click Post, and then head over to your social media site to see your published post.
That's all for the blog today! You can learn more about Microsoft Dynamics Marketing on our website. And as always, happy CRM'ing!


Hi,
I notice from your article that it mentions posting video via Social posting, do you know if you can post video to Twitter as well as Facebook?