Introduction
Many of the projects here at PowerObjects utilize some form of a web portal to access or update Microsoft Dynamics CRM information. In the past, they have used various forms of design documents to reach consensus with customers regarding the desired feature set of each portal. One of the challenges to this approach is that most of us don't like to read lengthy technical documents, and neither do our customers. This can lead to missing requirements, inaccurate processes and potentially low CRM user adoption. To help alleviate this risk, we have used wireframe documents that give customers a visual representation of what the portal will look like, but they lack interactivity.
On several recent projects, we have begun using the Sketchflow component of Microsoft Blend to solve this dilemma. Sketchflow is just one of several available "mocking" tools that allow you to produce an interactive sketch of your final product. This sketch can be distributed to multiple users and facilitates feedback through Sketchflow's markup features. The following blog is a brief walkthrough of how to build a sample Sketchflow.
Getting Started
Sketchflow is part of Microsoft Expression Blend 4 Ultimate. To create your project:
-
Open Microsoft Expression Blend 4 and click New Project from the File menu.
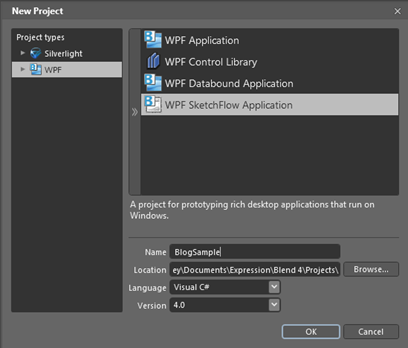
- Choose WPF Sketchflow Application or Silverlight Sketchflow Application. Expression Blend allows you to use the XAML markup created by Sketchflow in other applications if you wish. For example, if you were using Silverlight for your portal or maybe even a Windows 8 XAML application, this code could be reusable. In our case, we are just using the sketching benefits so choosing WPF is fine.
- Sketchflow allows the user to write C# or VB code as one method to add interactivity to the sketch flow (if needed). The default language is C#.
- Once you have named your new project, click OK to get started.
Application Layout
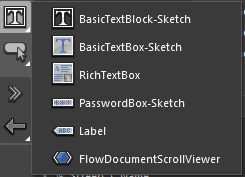
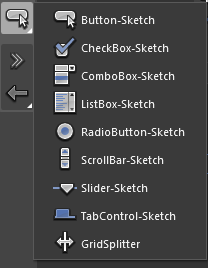
Let's take a quick look at the layout of Expression Blend with Sketchflow. The first area of interest is the Toolbox and specifically three sub-groups of controls; containers, text boxes and buttons/combo boxes. Right clicking on these icons will give you a popup submenu of xaml controls that you can use in your sketchflow. Controls with Sketch in their name have a specific "sketch" look and feel as if they were sketched out on an artist canvas or a whiteboard. It is best to use sketch controls because it reminds the user that this sketchflow is not the real application but a mere "sketch" of what the final product will look like.
Toolbox

Screens
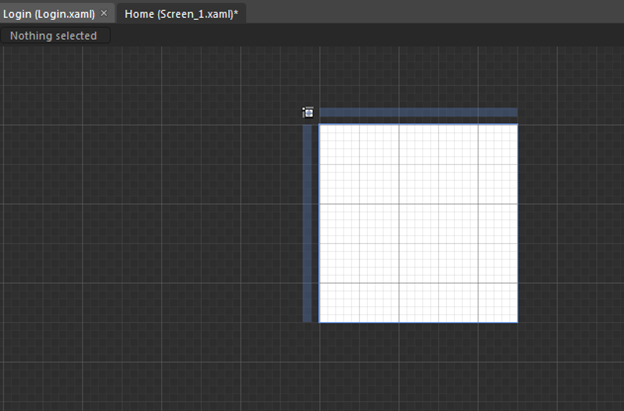
In Sketchflow, screens are equivalent to pages in a website or windows in an application. The Sketchflow Map window gives you a graphical representation of the screens contained within your sketchflow. There are two types of screens; connected screens (blue) and component screens (green). Our login screen is a good example of a component screen. The login controls we will build later our imbedded within our home screen. Connected screens are simply screens that are connected to one other to show navigation between pages.

Design Canvas
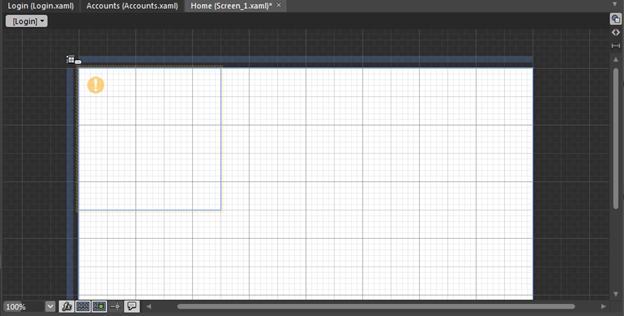
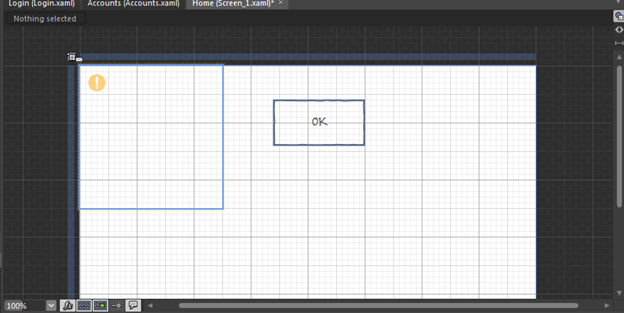
The Design Canvas is where we drag our controls and design our Sketchflow application. In the first screen screenshot below, there is an exclamation point on our main screen. This markup indicates that the component Login screen does not show because it is empty. In the second screenshot, you can see the added a sketchy button to the design canvas. The design canvas has zoom and view code capabilities as well. If you like to work in code, you can always click the XAML icon "<>" and see your controls representative in the XAML markup (see screenshot)

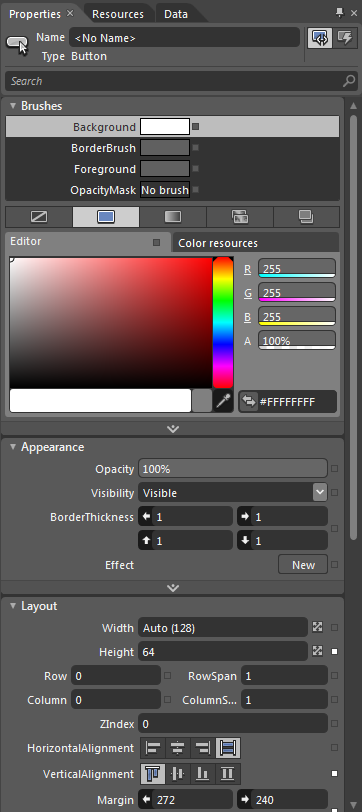
Properties, Resources and Data
Along the right hand side of the screen are three additional windows; Properties, Resources and Data. The Properties window allows you to edit the individual properties for selected controls. The resources window allows you to edit styles and resource dictionaries. And finally, the Data Window gives you access to create local data entities that can be used to bind sample data to controls. We will discuss the data capabilities later in this post.
Using Sketchy Controls
We will start our sample, but creating the required login controls in our login screen. For this sample, we won't wire up any security, but just use the login component screen to give you an idea of how the component screens work. So let's get started.
- When you created your project, you should see one screen name "Screen1". Rename this screen to Home. Double-click the tile of the screen in the Sketchflow Map window and change it to Home
- After you have renamed the screen, move your cursor over the word home. You should see a sub menu drop down below the word.
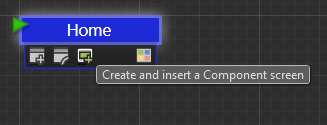
- Click the third icon to Create and Insert a Component Screen.
- Name the screen "Login"
-
Double-click just to the left of the header in the new window. This will open the login screen in your design canvas.
-
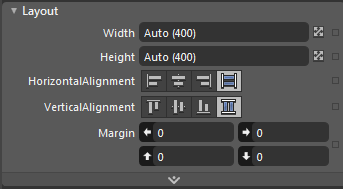
In the objects and timeline window, click the Layout Root element.

-
Clicking on this element will display the control's properties in the properties window. Find the layout group and change the width and height to 400. This will enlarge our canvas and give us room to drag our controls.
-
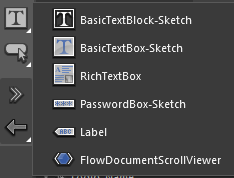
Right click the "T" icon in the Toolbox window to display the subgroup of controls. Left click the first control; BasicTextBlock-Sketch. We will use this control for our username label.
-
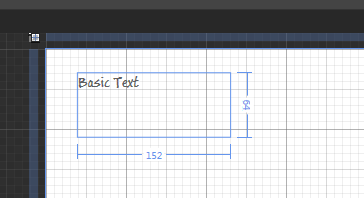
With this control selected, move your cursor back to the canvas. Left click on the canvas and drag your new control to the appropriate size. You can always change it later.
-
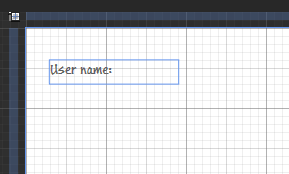
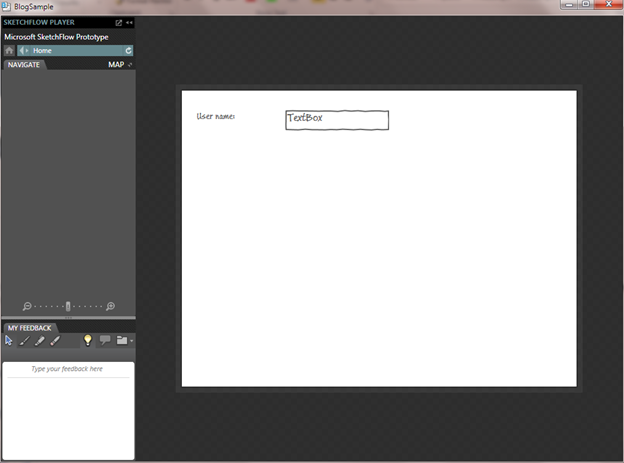
After releasing the mouse button, change the text inside to "Username".
- Right click the TextBlock icon from the toolbox again and choose the BasicTextBox-Sketch icon. Drag the text box control to the right of the TextBlock control you created in the previous step.
-
Click the F5 key to run the project. After a few seconds, Blend will open up a new window and display your application in the Sketchflow Player. It should look something like this.
-
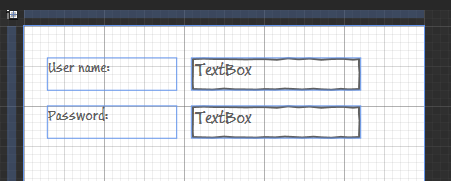
Close the player window and repeat steps 8-12 to create a password TextBlock and TextBox
-
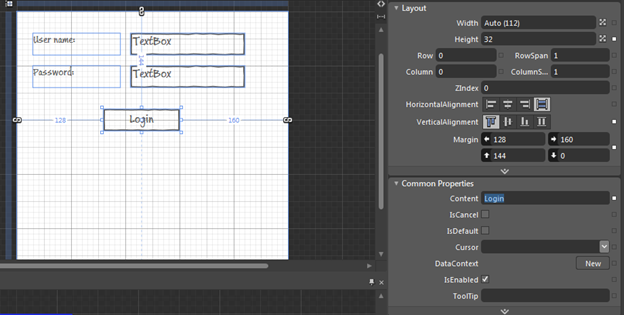
Right click on the Button in the toolbox and left click the Button-Sketch control. As we did previously, move your mouse back to your design canvas and click and drag the button just below your password text boxes. Change the label button by updating the text in the Common Properties section of the Properties window
- Click F5 again to run the application. The viewer is interactive. You can change the text inside of the text boxes and click on the login button. Review your login screen and close the viewer when you are finished.
Navigation
If you are doing a single page portal or application you could simply continue to add fields on this single screen and not bother with navigation. However most portals have several pages, so let's look at how we navigate between pages.
-
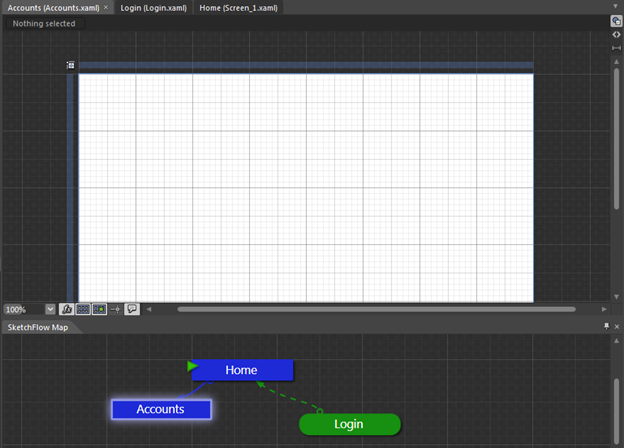
In the Sketchflow Map window, move your mouse over the home page header and click the first icon in the sub menu; Create a Connected Screen. Rename the screen "Accounts" as you did with the login screen. Your screen should look like the following:
- Switch back to the login screen by double-clicking the login screen icon or clicking the login screen tab at the top of the design canvas.
-
Right click the login button and choose Navigate To from the menu and then choose Accounts in the sub menu.
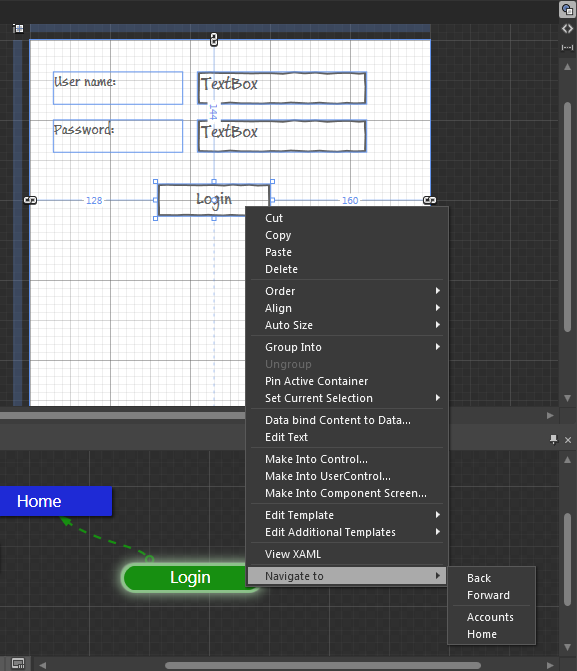
- Click F5 to run the application. When the viewer is display, click the login button to navigate to your blank Accounts screen.
- Put a Button-Sketch on the accounts screen.
-
As you did previously, right click and choose navigate. But this time, choose Home. This will allow you to return to the Home from the account screen.

- Press F5 again and test the navigation by clicking the Accounts and Home buttons.
Sample Data
Now that we have successfully built a few pages and the navigation, let's add some data and display it on our Accounts screen.
- Make sure you have the Accounts screen active in your canvas.
-
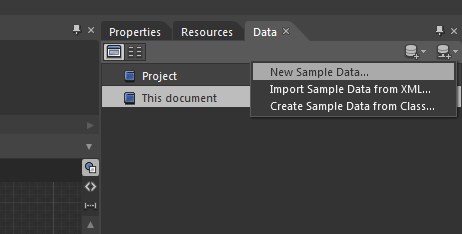
Click the Data tab in the upper right hand corner of the application. Select This Document and click the first icon that looks like a database. From the drop down menu, click New Sample Data
-
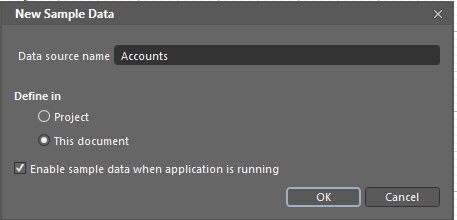
Rename the data source to Accounts and change the Define In attribute to This Document. Click OK.
-
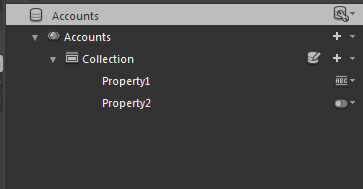
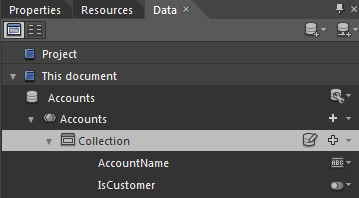
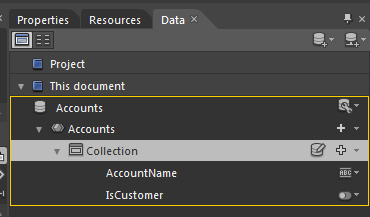
Expression will seed your data source with a collection and two sample fields; Property 1 and Property 2. Property 1 is a string and Property 2 is a Boolean (yes/no).
-
Double-click each property and change their name. Rename Property 1 to AccountName and Property 2 to IsCustomer.
-
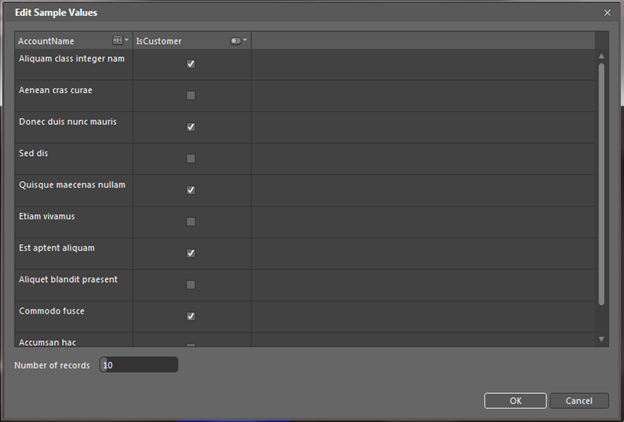
Click the icon next to the word Collection that has a database and pencil. This will open the Edit Sample Window. Expression blend creates fake data for you automatically. You can update this data with more appropriate fake data if you choose to. Click OK to close the window.
-
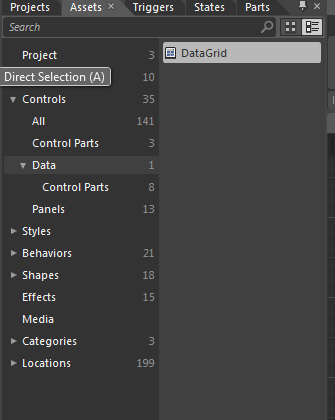
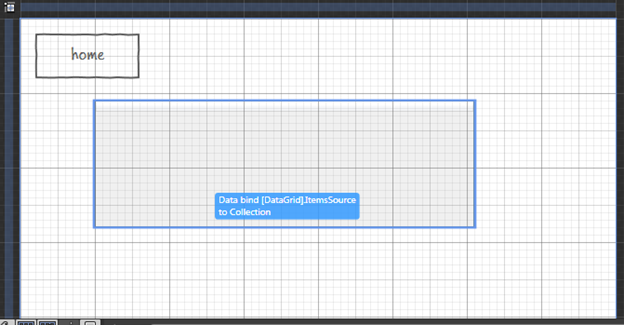
In Sketchflow, there is no Sketchy data grid. However, we can use the standard XAML datagrid to display data. In the Assets tab, click the Data menu under the Controls ,menu and choose DataGrid. Return to your canvas, click and drag the data control onto your screen. When dragging the control, Expression Blend will give you the dimensions. I would make it approximately 150 pixels high by 400 wide.
-
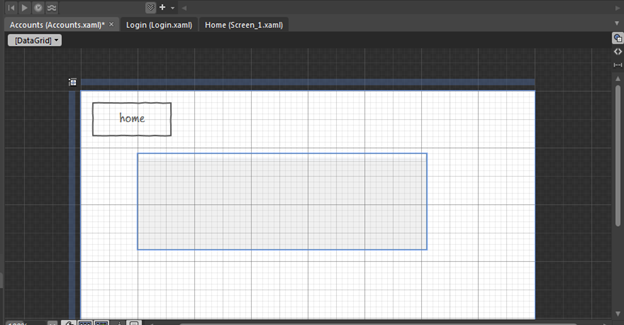
Click and drag the Collection object inside the Data tab and place it on top of your data grid.
-
Expression Blend will tell you it is about to bind the grid to your collection. After you have released the mouse, your data control should look like this.
- Click F5 to review the application. Expression Blend allows you to edit the data inline within the data grid. Keep it mind, the updates are not stored anywhere as this is just a mocking tool.
Distributing to Users
Now that we have a basic sample application, let's see how we distribute it to users.
-
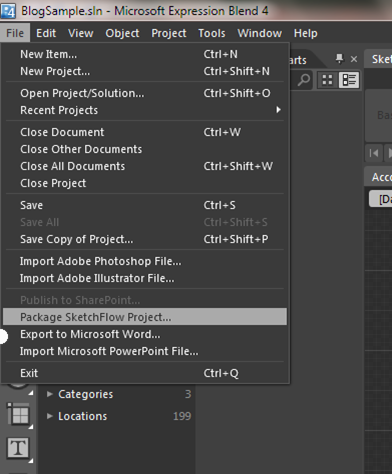
Click the file menu and choose Package Sketchflow Project
-
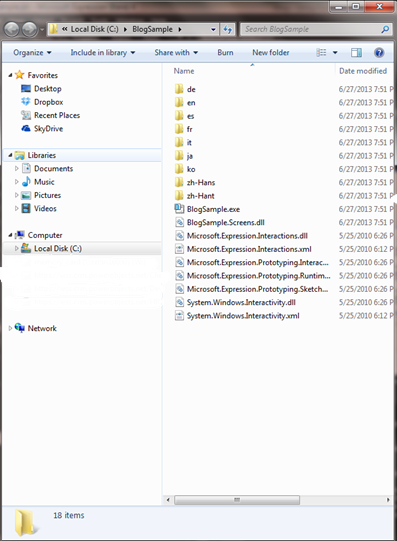
When the package process is complete, Expression Blend will open up a Windows Explorer window with the results of the package. To have users review your Sketchflow, send them this folder and have them execute the executable file. In this example, the file is named BlogSample.exe.
-
The executable runs the same viewer that is used when you run the project from within Express Blend. The user can interact with Sketchflow and add feedback.

-
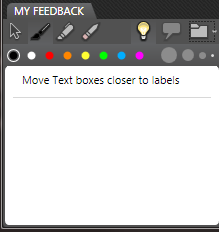
Using the feedback window in the lower left hand corner, the user can make annotated notes (graphical and test) regarding their feedback.

-
After the feedback has been entered, the user can export the feedback and send you the file. Click the drop down icon next to the folder in the upper right hand corner of the feedback window. Save the contents of the file.
-
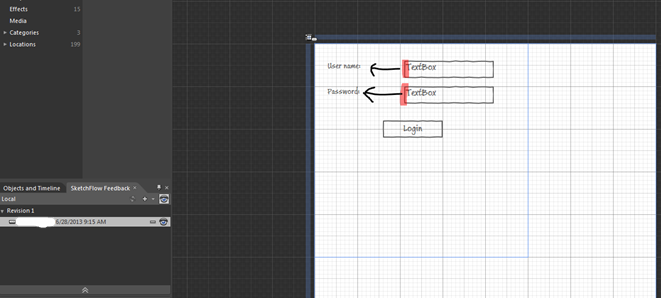
To view the feedback in Expression Blend, click the Window menu and click Sketchflow Feedback. This will open the Sketchflow feedback window next to the Objects and Timeline Window. Click the Plus icon and select the feedback from your user. After you have imported in the feedback file, you can show or hide the feedback for each user by clicking on the "Eye" icon. The feedback will be displayed inside the design canvas as shown below. You can import multiple feedback files from users.
Conclusion
Sketchflow is a powerful mocking tool built directly into Expression Blend. Mocking can be a significant time saver and will help your project mitigate potential risk by allowing users to "see" what a system will look like when complete. In this example, we tool a very simplistic portal example and built a few pages to show you what was possible, but we only scratched the surface of what is possible. For more information and several extremely helpful videos on Sketchflow, visit http://msdn.microsoft.com/en-us/expression/cc197141.aspx
Happy CRM'ing!


