
How Microsoft Power Platform is helping to modernize and enable...
In this webinar, our experts showcase a variety of demo use cases of how different components of the...
InsideView for Microsoft Dynamics CRM Online is an integration that delivers data, insights and connections directly into your Microsoft Dynamics CRM instance. Once installed and configured correctly, you will have access to InsideView in your account, lead, contact, and opportunity pages!
InsideView can be installed into CRM via downloaded solution or can be installed directly from the Office 365 portal. Installing InsideView via solution and adding it to a CRM form as a Web Resource is relatively simple.
1. Depending on where you want InsideView to be on your form, you can select from a "skinny" or "wide" option. Additionally, there are a couple of additional steps that are needed for InsideView to work properly in CRM.
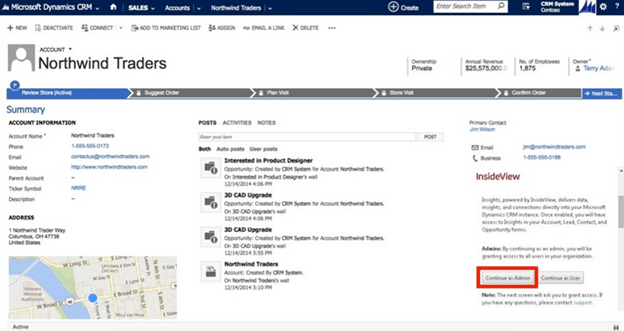
2. After importing the solution, add it your desired CRM form. Click Continue as Admin in the InsideView section. This will grant access to you and all users in the organization.
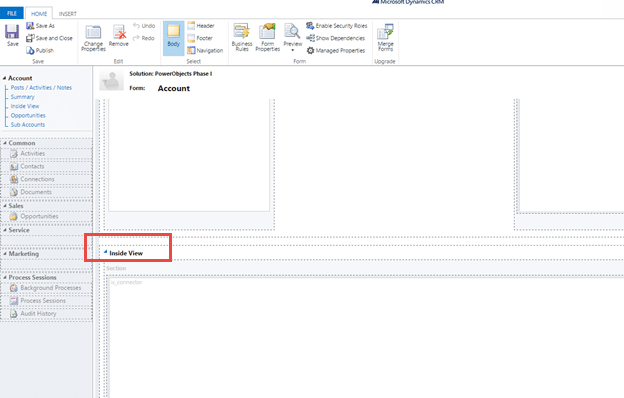
3. The final step is the trickiest and least obvious. Once you have verified access as an administrator, you'll need to open the InsideView web resource on the form to modify the script on the web resource on all forms.
4. You need to verify that the web resource custom parameter is referencing the correct form name (i.e. "Information" or "Contact" or your custom form name.) You see, when the solution is installed, it puts the "information" form name correctly into the web Resource for the "information" form, but it uses "main" for all other forms instead of the actual entity name.
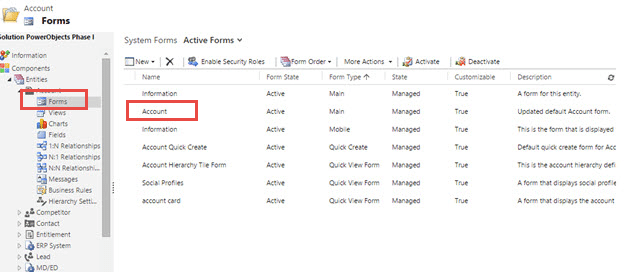
5. Navigate to the form that you have placed the web resource on and open the form.
6. Double click the InsideView web resource to open the web resource properties window.
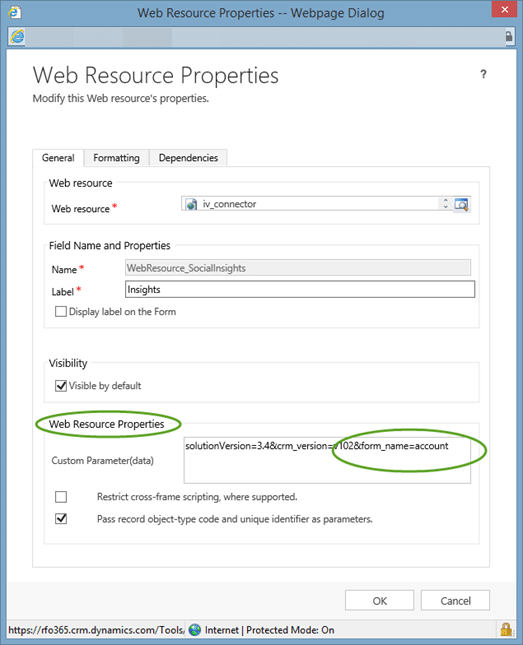
7. In the web resource properties window, locate the Customer Parameter box were you can view and edit the web resource script. The script needs to end by referencing the correct entity. The default upon import is set to:
"=main"
8. You simply need to remove "main" and replace it with the correct entity form name. In the case below "=account" is referencing the Account entity. It would be the same with any other entity you choose to use it on, "=contact", "=opportunity", etc.
We hope you found this blog helpful if you decide to use InsideView for CRM!
Happy CRM'ing!


