How Microsoft Power Platform is helping to modernize and enable...
In this webinar, our experts showcase a variety of demo use cases of how different components of the...
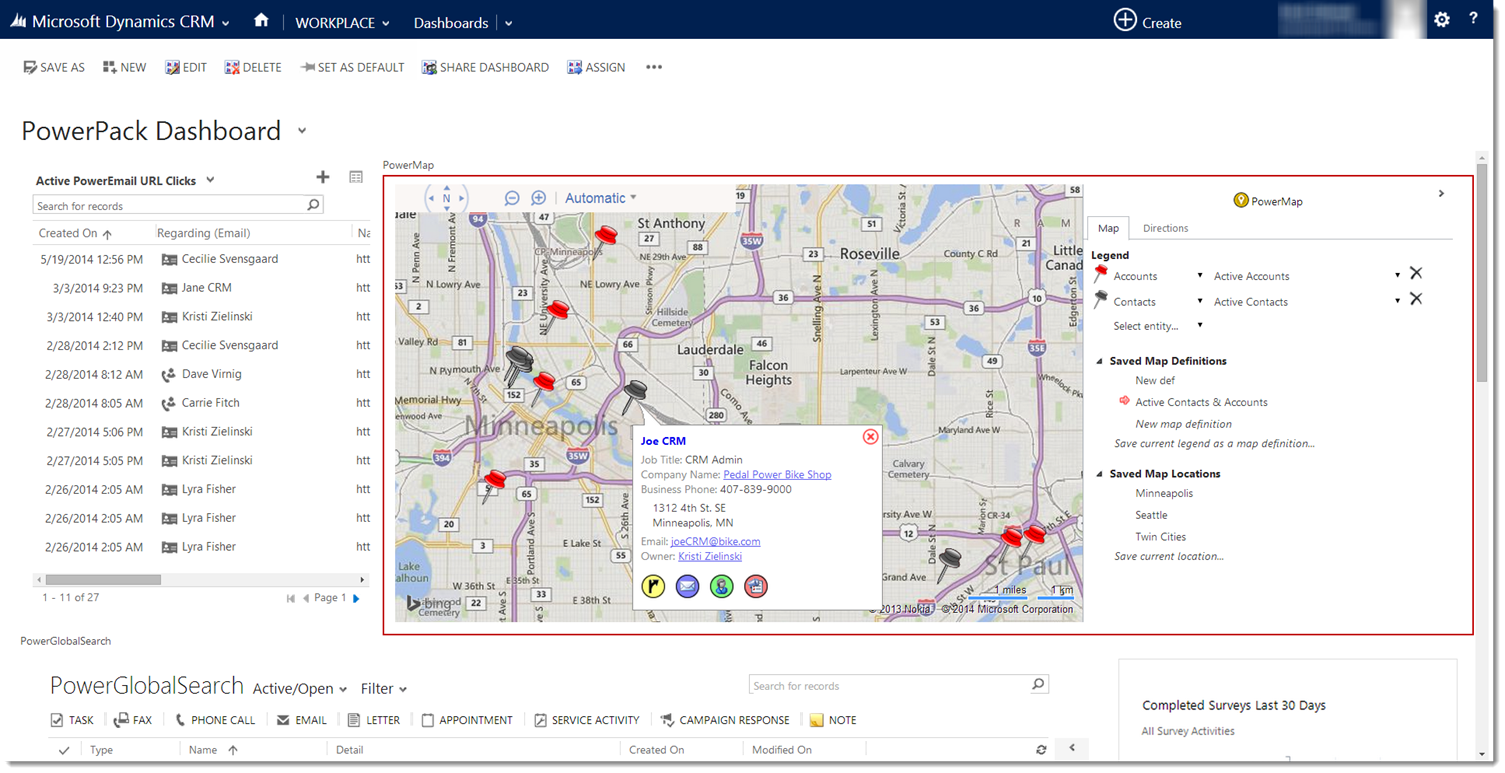
If you're looking for a more visual representation of records in your Microsoft Dynamics CRM, PowerMap will be your new best friend. PowerMap lets users choose an entity in CRM, choose a view, and plots all of the individual records from that view on one map. Users can map more than one entity, and more than one view at a time, and can also save their PowerMap preferences, including map configurations, zoom levels and views.
Here are a few ways PowerMap can be used:
Another awesome feature of PowerMap is that it can be added directly onto a dashboard for ease of use. The below steps will give you a walk-through of how to add this powerful add-on directly on your dashboard!
Things you will need:
Once you have completed the install and configuration you are ready to place PowerMaps on your dashboard!
1. Within CRM 2013 click on the little house icon on the top ribbon. This will bring you to your homepage.

2. From the homepage, click on the +New button. This will bring you to the dashboard layout selector.
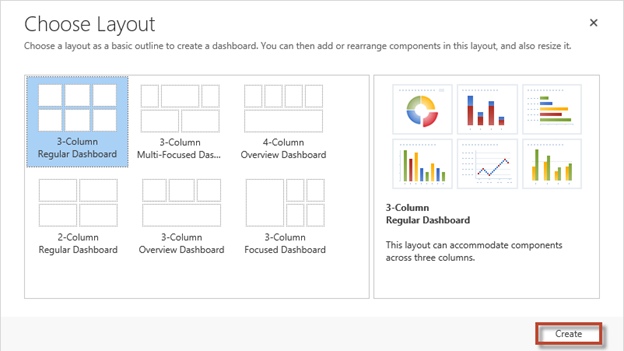
3. Here you will select the type of layout you want for your dashboard. We will use a 3-column regular dashboard.
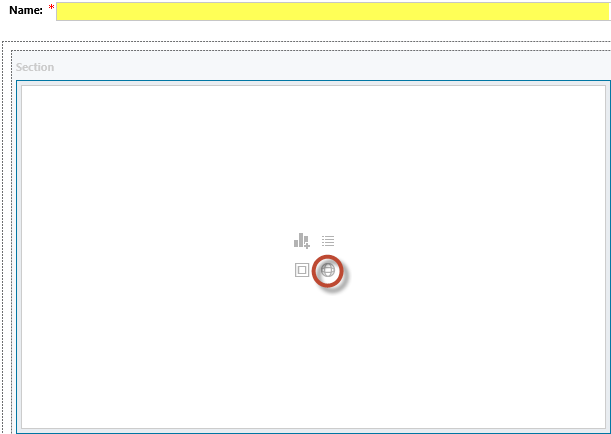
4. Click Create. This brings you to the dashboard editor. Name your dashboard to your liking. In the squares below, you will notice in the middle there are 4 icons that represent 4 objects you can add to your dashboard:
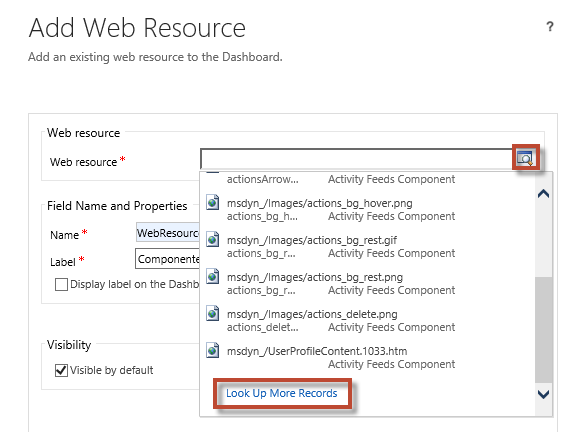
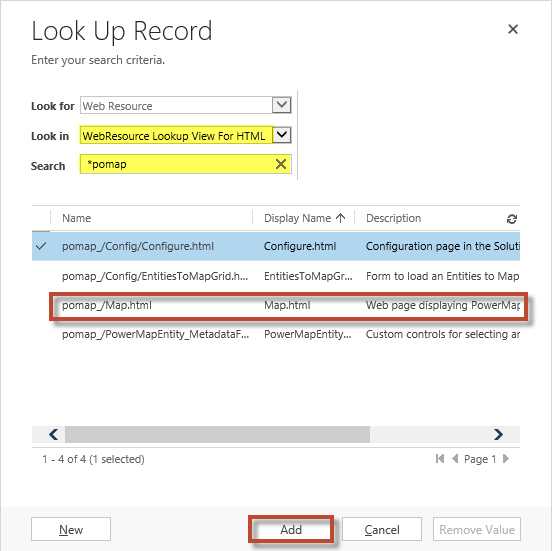
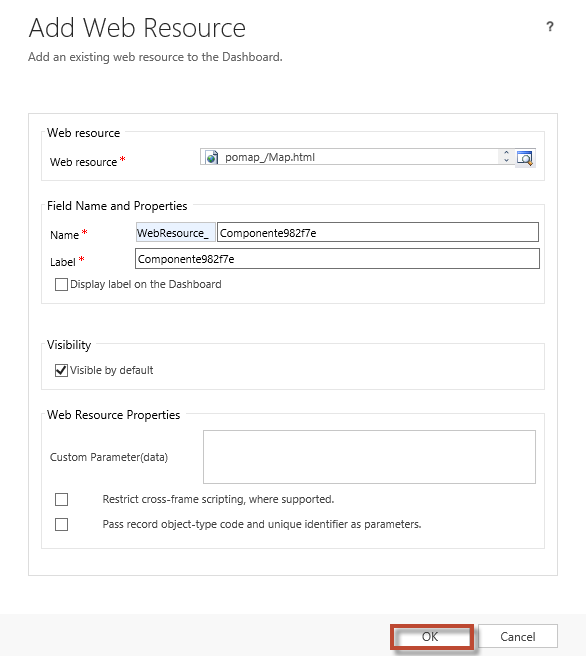
5. For the purpose of adding PowerMap to the dashboard, select Web Resource. This will bring you to the Add Web Resource page. Click on the magnifying glass and scroll down to Look Up More Records. This will bring you to the Look Up Record screen.
6. On the Look Up Record Screen, do the following:
7. Back on the Add Web Resource screen, click OK.
8. You can leave the values here as default.
9. All you have to do now is add any other dashboard components you wish to have on your dashboard, then click Save.
10. Refresh your browser then click on your dashboard view selector and select your dashboard you just created.
And there you have it. You have learned how to place PowerMap in a dashboard in Dynamics CRM!
If you like PowerMap and want to learn more, we have many more blogs on the PowerMap add-on that you can reference.
Happy CRM'ing!