
How Microsoft Power Platform is helping to modernize and enable...
In this webinar, our experts showcase a variety of demo use cases of how different components of the...
Let's say your boss asks you to put together a licensing breakdown for Office 365. Would you know what steps to follow to compete this task, with all of the necessary details, to knock it out of the park? Today's blog will show you how and include tons of troubleshooting tips along the way.
Before we start, check out our previous blog about PowerShell, where we talked about using PowerShell to help manage your Office 365 environment with these commands:
Import-Module MSOnline
$O365Cred = Get-Credential
$O365Session = New-PSSession –ConfigurationName Microsoft.Exchange -ConnectionUri https://ps.outlook.com/powershell -Credential $O365Cred -Authentication Basic -AllowRedirection
Import-PSSession $O365Session -AllowClobber
Connect-MsolService –Credential $O365Cred
Now, let's get started on your adventure to figure out and complete this request.
You head out and start digging around. You find this:
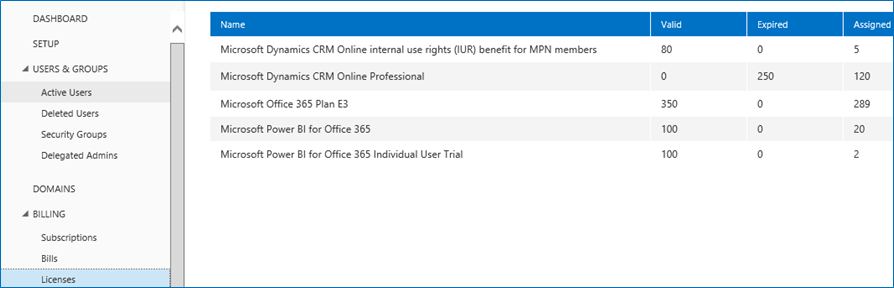
That is all well and good, but your boss also wants a breakdown of who has what.
You notice there can be views under Active Users:
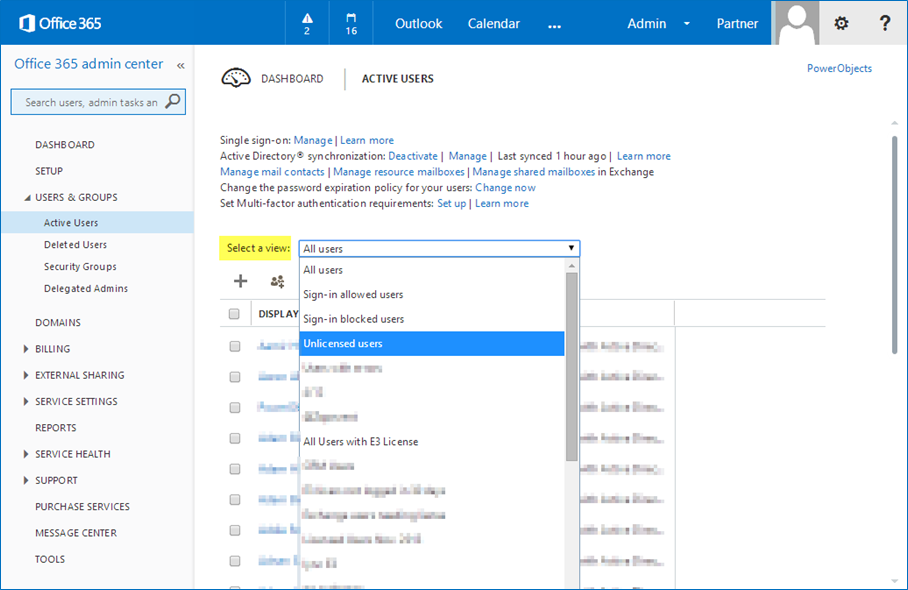
This list proves to be a little disheartening. None of these gives you what you need and you really can't do anything with a view other than look at it, and the boss did say he wanted a detailed view. What are you going to do? Well, we have good news for you! You can start up PowerShell and log onto Office365 as detailed here.
You start looking for commands to complete this task. You find 'Get-MsolAccountSku' which returns this:

You say to yourself, "that looks a lot like the information I got when I went to the Office 365 website." Still, it's not very helpful in breaking that information down, so you keep looking.
Then it hits you. The information you need should be held with the user. You do 'Get-MsolUser' and it returns this:

It says that this account 'isLicensed.' Now, the question is "Licensed with what?" You remember the 'format-list' command, or fl for short, which is designed to bring back everything it knows about a given object.
You run 'Get-MsolUser –UserPrincipalName someuser|fl *' and start looking through the returned fields. You find this:
![]()
To get only that piece of information, you run 'Get-MsolUser -UserPrincipalName someuser|select UserPrincipalName,licenses':

Great, you finally have the information you were seeking! But there's more…
You need to get that information into something you can work with. You think to yourself "I should just be able to export to CSV, right?" You run
'Get-MsolUser -UserPrincipalName someuser|select UserPrincipalName,licenses|Export-Csv .licenses.csv.'
You take a look at the output and see this:

Well, that didn't work very well.
First of all, you really don't need '#TYPE Selected.Microsoft.Online.Administration.User'. That is easy enough to get rid of. Using the '–NoTypeInformation' switch on the 'Export-Csv' command does the trick. But the 'Licenses' information wasn't what you expected. It gave a System.Collections name instead of the actual list of names. Now what?
HINT: The explanation for that is beyond the scope of this article. Suffice it to say the field that was returned is of MemberType 'NoteProperty'.
To help figure it out, you run 'Get-MsolUser -UserPrincipalName someuser|select UserPrincipalName,licenses|Get-Member' and see:

So, Licenses is of MemberType 'NoteProperty.' Now, the question is, "how do I get the actual list?"
Let's write a quick script!
$a= Get-MsolUser |select UserPrincipalName,licenses

foreach ($member in $a) {
$userName = $member.UserPrincipalName
$output = new-object PSObject
foreach ($group in $member.licenses){
$output | add-member NoteProperty "UserName" -value $userName -Force
$output | add-member NoteProperty "AccountSkuId" -value $group.AccountSkuId -Force
$output | export-csv .licenses2.csv -Append -NoTypeInformation -Encoding ASCII
}
}
Hey? What's going on here? Let's take a look:
$a= Get-MsolUser |select UserPrincipalName,licenses
This collects all users in your domain and their licenses.
Now that we have that, let's get the information into a readable format. We loop through each member in the "$a" array using the "foreach" methodology. We get the user name by extracting it with "$userName = $member.UserPrincipalName."
Now, because "$member. licenses" is really an array, we loop through it to extract all licenses. Within each loop, we append each piece of information to the csv file using this:
$output | export-csv .licenses2.csv -Append -NoTypeInformation -Encoding ASCII.
The switches ensure we exclude the type info and that the output is in ASCII format.
So, run your script:
![]()
Open the file and see what you get.
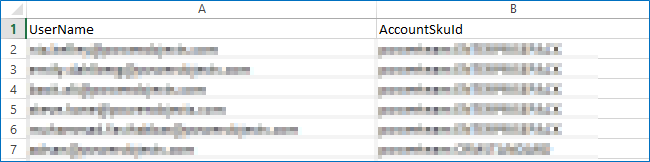
Now, with a little pivot table magic, you get this:
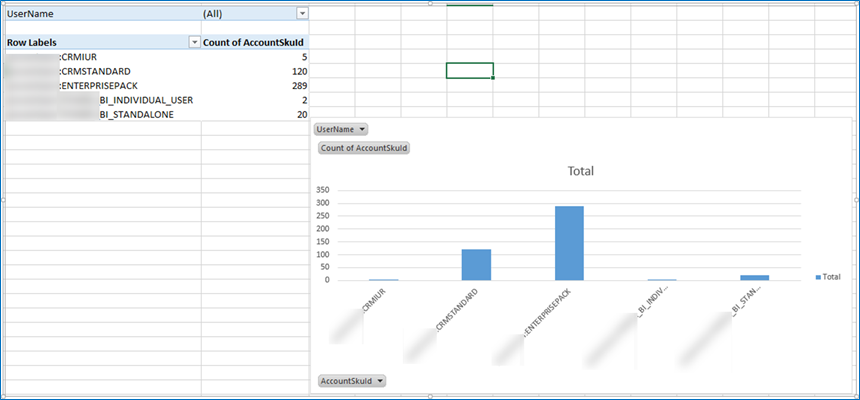
It looks a lot like what you got when you went to the Microsoft Office 365 website, but you can now break it down to what user has what licensing. Your boss will love you and victory is yours!
Stay tuned for more PowerShell adventures and as always, happy CRM'ing!


