
How Microsoft Power Platform is helping to modernize and enable...
In this webinar, our experts showcase a variety of demo use cases of how different components of the...
In previous posts we discussed the basics of how to create Word templates in Dynamics 365 and then took a "deeper dive" into some other aspects of Word templates. Today's blog will take the next step, discussing "System vs. Personal" Templates.
System Templates are uploaded to the System Document Templates area of CRM at Settings > Templates > Document Templates.
Templates uploaded to the System Templates area are available via their associated entity to any users who have access to the particular entity and have been granted permissions for Templates.
Here is a sample view of the System Templates area:
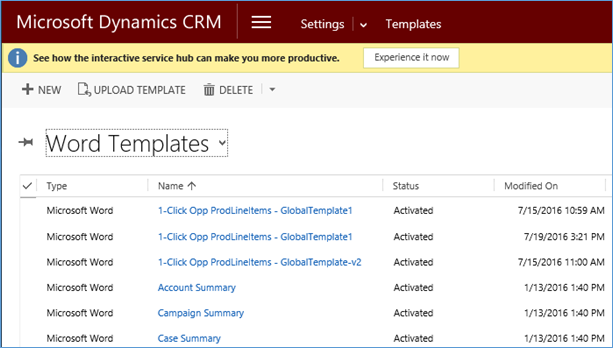
Please note that for purposes of this demonstration, I selected the "Word Templates" view for clarity. All of the same principles will apply to MS Excel Templates.
Likewise, Personal Templates are uploaded to the Personal Document Templates area in 1 of 2 ways of your choosing:
1. From within the entity in which the Template will be used (covered in this earlier blog post)
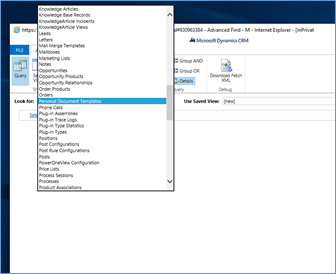
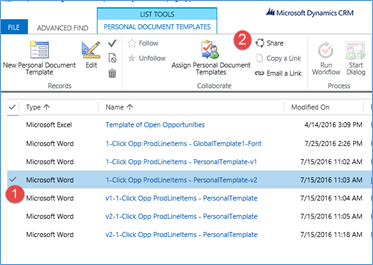
2. Via Advanced Find > Look for: Personal Document Templates as shown below:
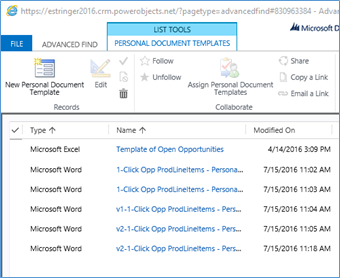
You may have noted that in each example, System Templates and Personal Documents, there is more than one template with the same or a very similar name. This is because Dynamics 365 does not overwrite the file with the same name, it retains the name and updates the date/time stamp of the file.
This is important to know to avoid confusion. Here are a couple of recommended "Best Practice"':

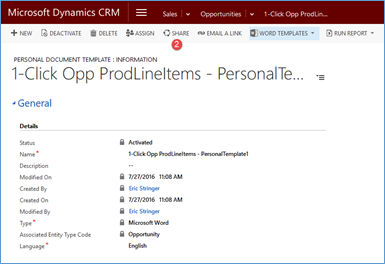
A last note about Personal Templates is just that, they're Personal. You are the only one who can see, access, and use them. You may want them to remain Personal for a variety of reasons. However, if you have to make only certain templates available for certain individuals, then you do have the ability to Share your personal templates (this is assuming that you have this permission as a part of your security profile).
Sharing a Personal Template:
From the 'Personal Document Templates' Advanced Find:
1. Select the template that you want to share.
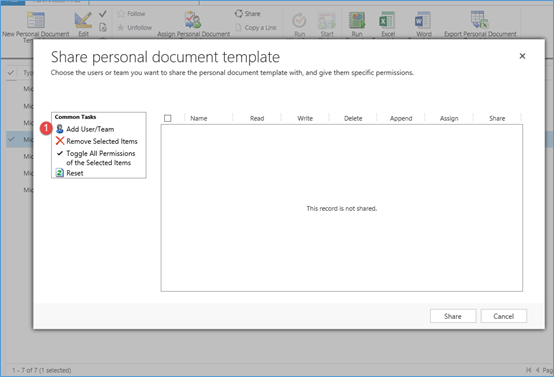
2. Click the 'Share' button in the top Ribbon (or from the Personal Template import screen).
3. Click 'Add User/Team' in the Share template window.
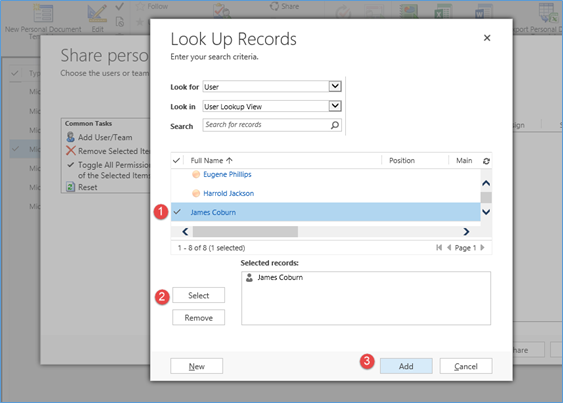
4.From the 'Look Up Records' window, select the User(s) you want to share with.
5. Click the 'Select' button to add the user(s) to the Selected records list.
6. Click the 'Add' button.
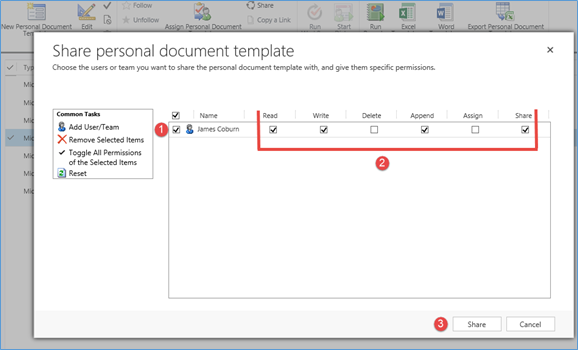
7. Select the Checkbox next to the user(s) name(s).
8. Select all of the permissions you will grant to each user(s) for the template you are sharing.
9. Click the 'Share' button at the bottom of the screen.
That's all for today! If you're itching for more, check out our past post, It's Never Been This Easy: One Click Document Generation in CRM.
Happy Dynamics 365'ing!


