
How Microsoft Power Platform is helping to modernize and enable...
In this webinar, our experts showcase a variety of demo use cases of how different components of the...
The use of NAICS Codes in Microsoft CRM is becoming a more and more frequent request. Many businesses use The North American Industry Classification System (NAICS) Codes to classify their customers and prospects. In today's blog, we will show you a nice and easy way to leverage CRM 2015's hierarchy visualizations to manage and present NAICS Codes. Let's begin!
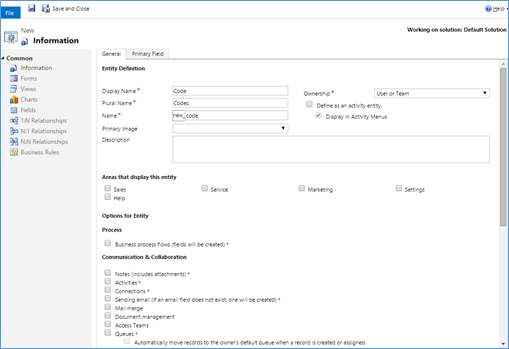
1. First, we need to create a new entity called Codes. Be sure to uncheck all options except the section where you want your new entity to appear:
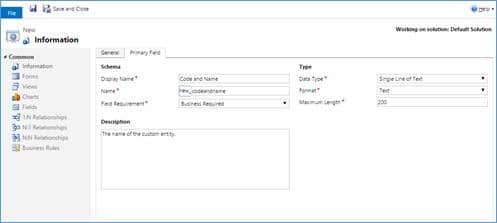
2. Next, name the primary attribute "Code and Name" and make 200 the maximum length.
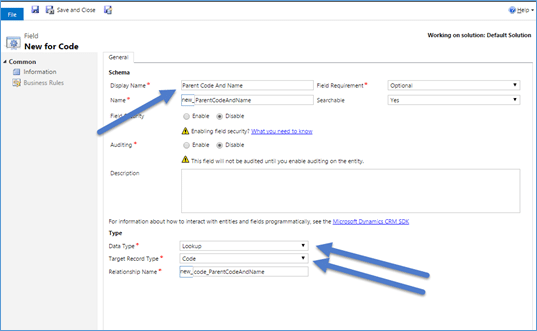
3. Add the following new attributes to your entity:

Here is a screenshot of the parent code and name attribute:
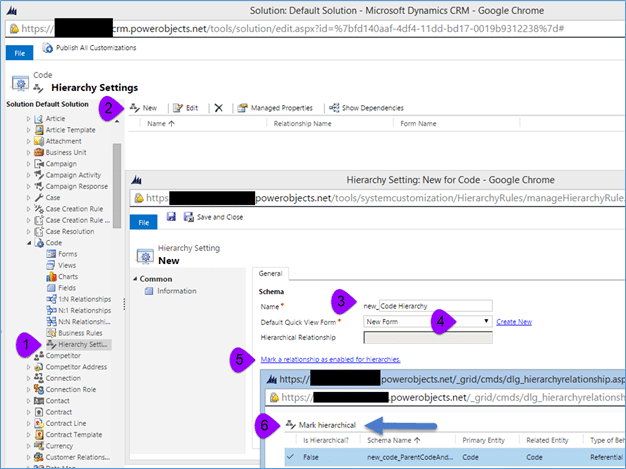
4. Create a new quick view form that you'll use for the hierarchy settings later.
5. Set hierarchy.
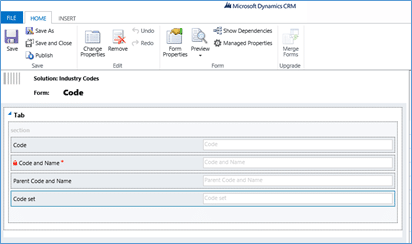
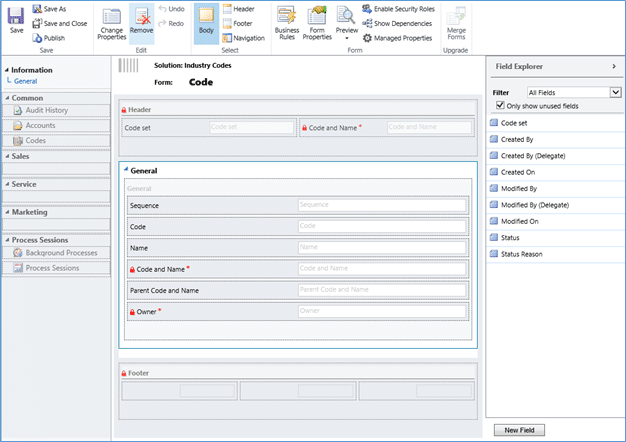
6. Lay out your form as shown below.
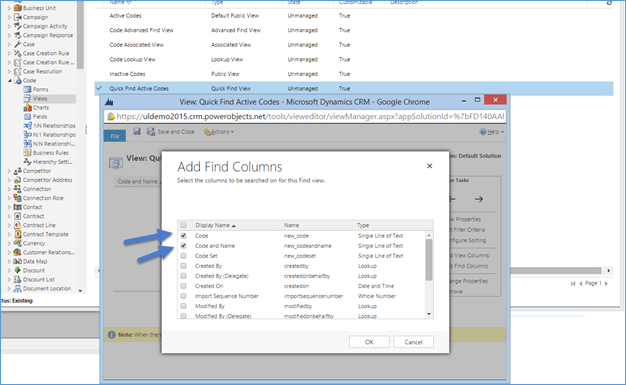
7. Edit your quick find active codes view and add code and code and name to the find columns. This will allow the user to search by code or by the name of the code.
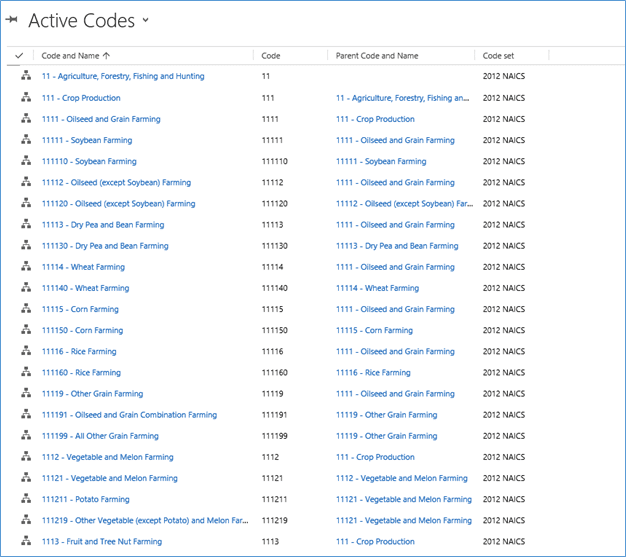
8. Now you can load your codes into CRM. This is what the code list will look like:
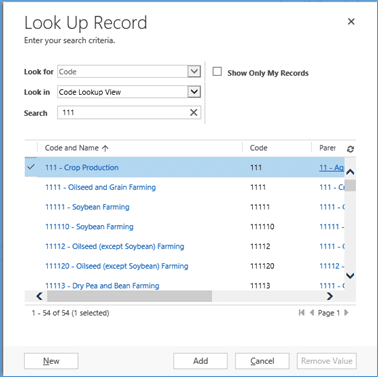
9. Now, we add a lookup on codes to any record in CRM. Users will be able to search on codes and names. In addition, they will be able to see the parent code in the list. Let's take a look at our new lookup.
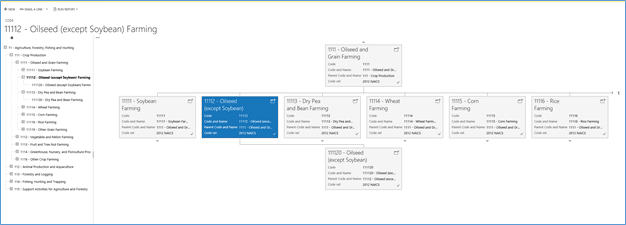
10. Finally, we are able to leverage the hierarchy visualizations to see our NAICS codes!
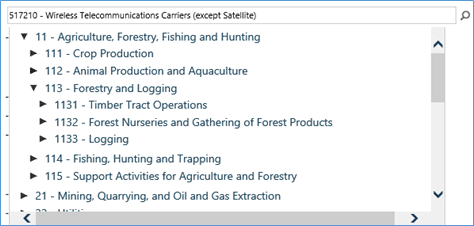
If you want to get fancy, you can add a custom control to your form so that you can leverage the hierarchy when selecting the NAICS Code. This custom control filters on the code set and sorts on your sequence number that is populated using PowerObjects' PowerAutoNumber add-on!
Here is what it looks like:
We hope you found today's blog helpful. Keep checking our PowerObjects blog for more tips and tricks! If you are looking for more information on creating custom entities or hierarchy visualizations check out other blogs on the topic as well as the CRM Book!
Happy CRM'ing!


Nice approach. How do you handle multilanguage requirements for the codes?
Hi Joe,
My Observation,2nd Screen Shot in the blog need correction I guess. Would it not be more appropriate if it would be “Code and Name" screenshot.