Looking for PowerObjects? Don’t worry, you’re in the right place! We’ve been part of HCL for several years, and we’ve now taken the final step in our acquisition journey: moving our website to the HCL domain. Nothing else is changing – we are still fanatically focused on Microsoft Business Applications!

PowerObjects Blog 

for Microsoft Business Applications

|

Adding Fields to the Merge Functionality in Dynamics CRM when Using Multiple Security Role-based Forms

Post Author: Joe D365 |

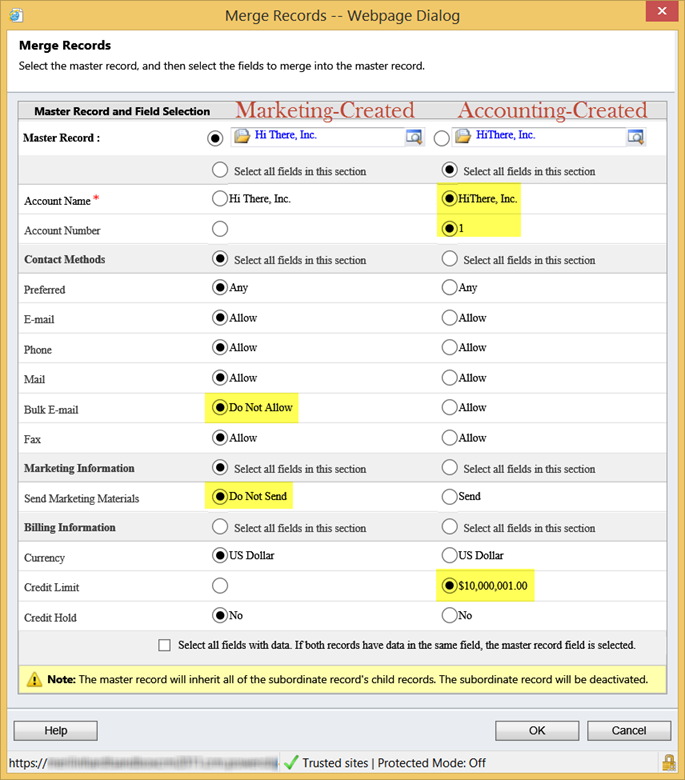
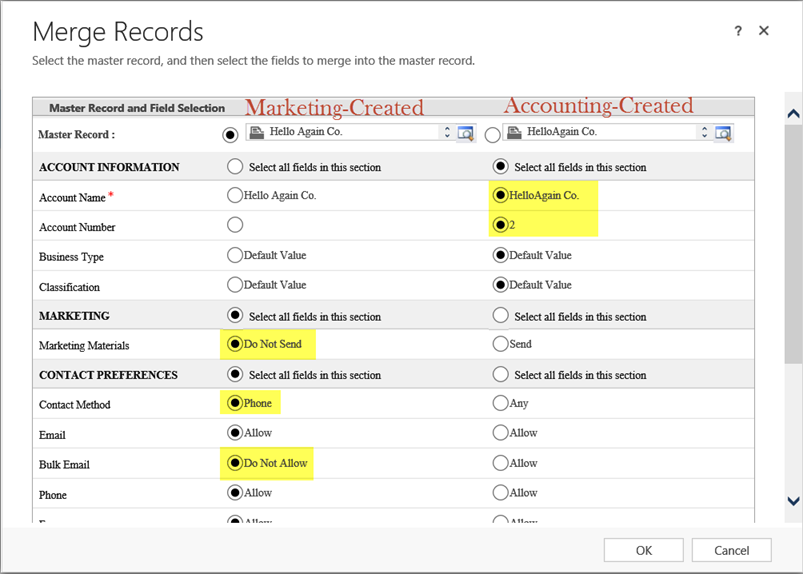
Role-based forms are a great way to simplify CRM for users by showing them only what they need to see for their job role. But be careful! There are pros and cons to using role-based forms in Dynamics CRM. The use of role-based forms can cause issues when merging records. Some fields may contain data but the Merge functionality only shows the fields that the user sees on their role-based form (or, if they have access to multiple forms, the last used role-based form).

Luckily this is easy to remedy.

We'll discuss how to keep fields hidden from the user on the form, but ensure they are displayed in the Merge functionality.

  • If you are using the role-based form capability of Dynamics CRM 2011, then you need to be sure ALL fields are on ALL "Main" forms.
  • If you are using multiple role-based forms in Dynamics CRM 2013, the same also applies but you should to be selective about the fields on the Quick Create form.

With those things in mind, let's get started!

First, are you on Dynamics CRM 2011 or Dynamics CRM 2013? (Click and you'll jump down to the instructions you need.)

Dynamics CRM 2011

  1. Navigate to the most restrictive form. For this example, we're going to say that that's the ".Marketing" version of the form.
    Merge Functionality
  2. Create a new tab, toward the bottom of the form, naming it appropriately such as "Additional Fields".
    Merge Functionality
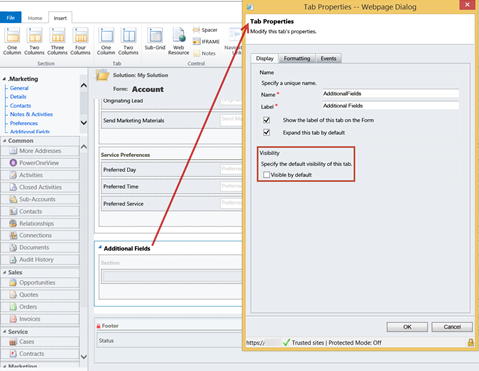
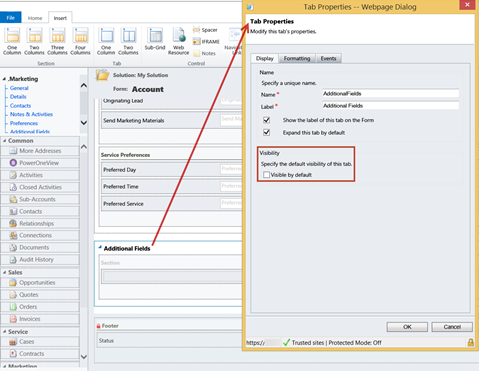
  3. Double click on the tab you just created and un-check the Visible by default option.
    Merge Functionality
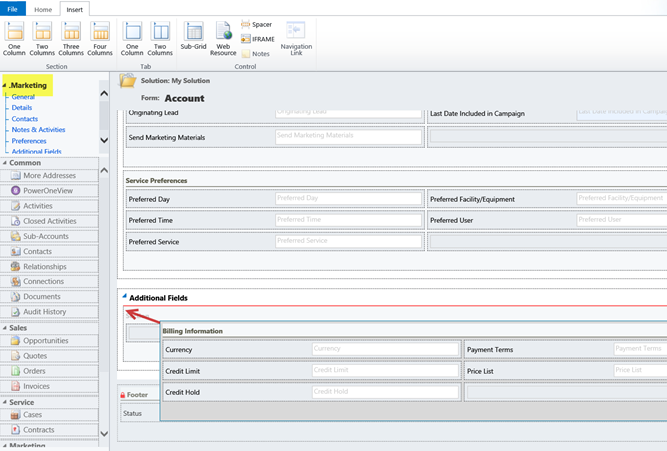
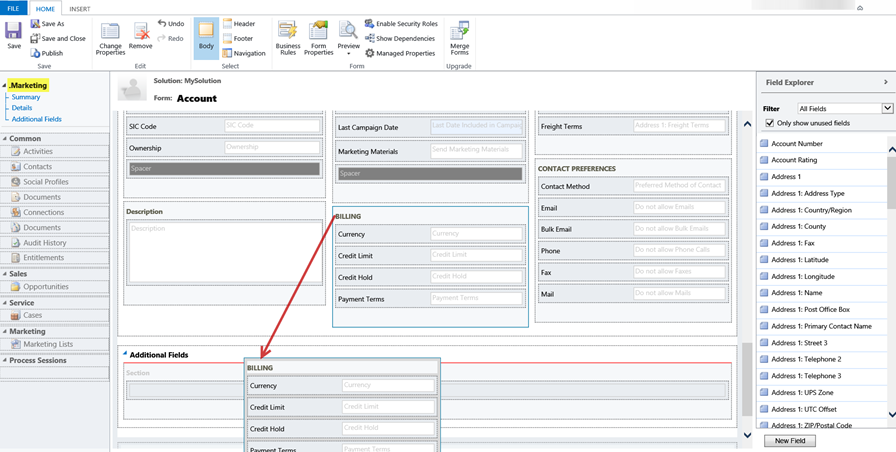
  4. Put all the other fields / sections from your other form versions into that hidden tab.
    Merge Functionality
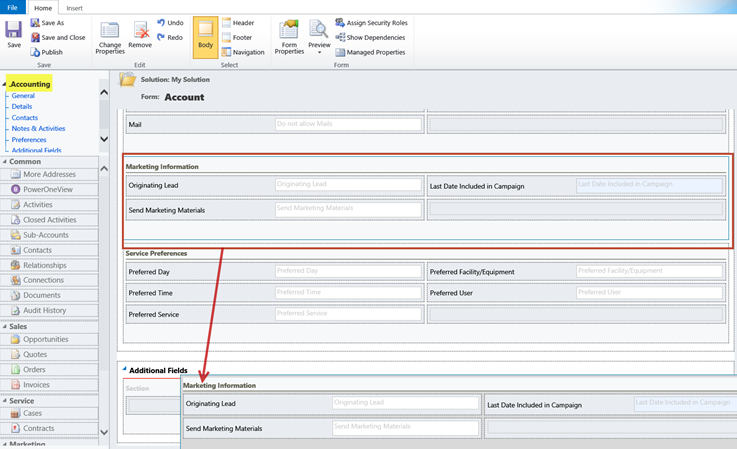
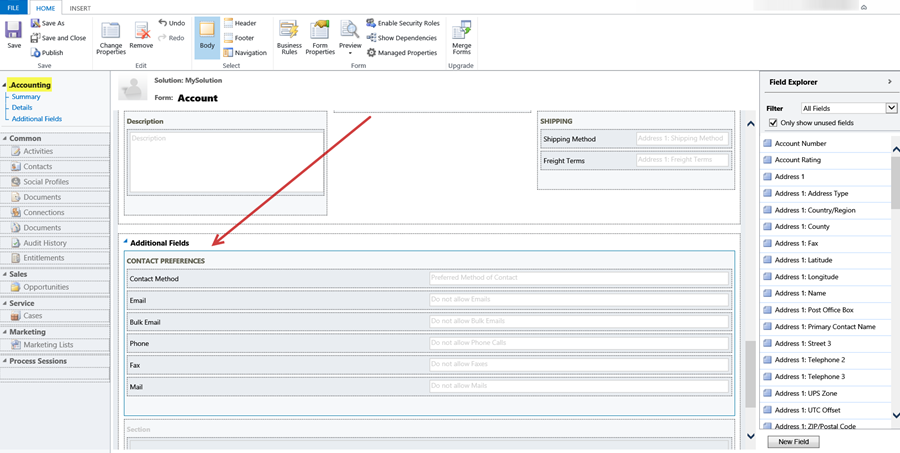
  5. Repeat for the other form versions.
    Merge Functionality
  6. Have a specific field that you need to show if it meets certain conditions? In Dynamics CRM 2011, this is done via JavaScript.Below is an example of how to do this, since your business requirements dictate what is revealed or hidden and when as well as when / if fields are read-only.
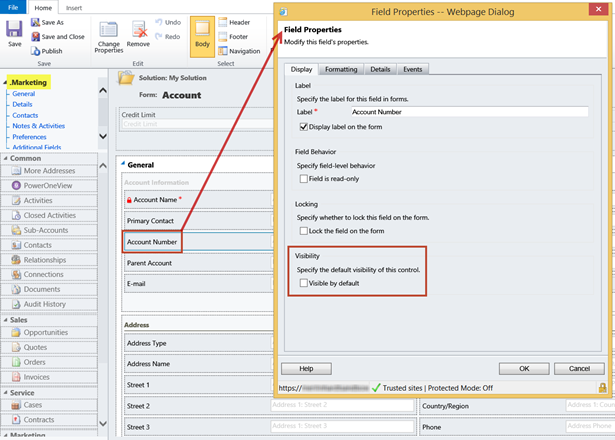
    1. In a visible section, hide the specific field (for example, "Account Number") by double-clicking on it and editing the Field Properties. If the field needs to be read-only, you can do that as well.
      Merge Functionality
    2. Create a Web Resource and write your function to hide the field when empty but reveal it when it contains data. (Don't know how? Give us a call!)
    3. Put your function in the Form OnLoad event manager of the ".Marketing" form.
    4. Now the field only shows on the form when they need to see it AND it shows up in the Merge functionality!
      Merge Functionality

Dynamics CRM 2013

  1. Navigate to the most restrictive form. For this example, we're going to say that that's the ".Marketing" version of the form.
    Create a new tab, toward the bottom of the form, naming it appropriately such as "Additional Fields".
    Merge Functionality
  2. Double click on the tab you just created and un-check the Visible by default option.
    Merge Functionality
  3. Put all the other fields / sections from your other form versions into that hidden tab.
    Merge Functionality
  4. Repeat for the other form versions.
    Merge Functionality
  5. Have a specific field that you need to show if it meets certain conditions? In Dynamics CRM 2013 you can use Portable Business Logic; no tricky code needed!Below is an example of how to do this, since your business requirements dictate what is revealed or hidden and when as well as when / if fields are read-only.
    1. In a visible section, hide the specific field (for example, "Account Number") by double-clicking on it and editing the Field Properties. If the field needs to be read-only, you can do that as well.
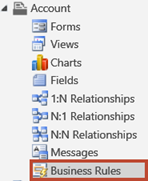
    2. Go to the Account entity's Business Rules area.
      Merge Functionality
    3. Click New.
    4. Change the Scope to the ".Marketing" form.
      Merge Functionality

      NOTE: By changing the Scope for "All Forms" to ".Marketing" this Business Rule will not work on the Account Quick Create form. (This should be okay though because we probably don't know the Account Number for a brand new, never-done-business-with-them-before Account.)
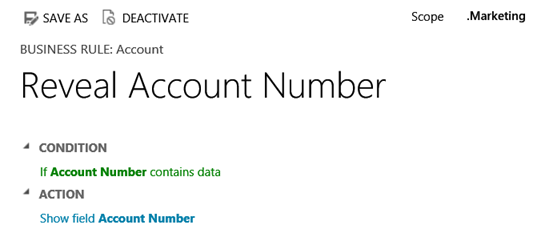
    5. Set your Condition and Action.
      Merge Functionality
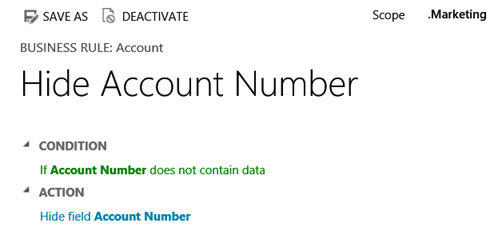
    6. WAIT! You aren't done. J Do a quick Save As to make a copy of the Business Rule and write the opposite Condition and Action.
      Merge Functionality
    7. Now the field only shows on the form when they need to see it AND it shows up in the Merge functionality!
      Merge Functionality


Now that we've shown you how to add fields to the form and hide them, the merge functionality should work perfectly. For more information on forms check out our blogs and all their functionality. Happy CRM'ing!

Joe CRM
By Joe D365
Joe D365 is a Microsoft Dynamics 365 superhero who runs on pure Dynamics adrenaline. As the face of PowerObjects, Joe D365’s mission is to reveal innovative ways to use Dynamics 365 and bring the application to more businesses and organizations around the world.

4 comments on “Adding Fields to the Merge Functionality in Dynamics CRM when Using Multiple Security Role-based Forms”

  1. Hi,
    Very interesting article indeed!
    What about the fields we need to be summed? How can we add any new fields for which need to calculate their sum while merging accounts?

  2. How can we include "CreatedOn" field in the Merge view? I have even tried to créate another calculated field with that info and put it also on the form, but I cannot see any of them in the Merge view.

PowerObjects Recommends