
How Microsoft Power Platform is helping to modernize and enable...
In this webinar, our experts showcase a variety of demo use cases of how different components of the...
As most people who work with CRM 2011 on a daily basis know already, there are some cool customization tricks in CRM 2011 that can enhance the user experience. I recently came across an opportunity to combine multiple new features into one form.
A common customization that I receive is to allow one Entity within CRM to be utilized for multiple different types of other records.
In previous versions of CRM, JavaScript was used extensively to customize CRM forms to streamline the user experience. In CRM 2011 Microsoft has given us some new customization options, to give those of us that are not "Coders" or "Programmers" the ability to add cool functionality to forms, with very little actual coding.
Here is an example: I want to create New records in CRM to manage the different types of Events my company holds for our clients. (i.e.Tours, Conferences, Events) Within each of these Events, I would like to track the customers that will be attending along with some basic information about their attendance. For reporting purposes, utilizing the same attendance record for all of the new entities makes the most sense. This allows me to use "Out Of The Box" CRM queries to create views/dashboards quickly without requiring the assistance of a Report builder or Programmer.
Create the New Entities: Tours, Conferences, Events and Attendee
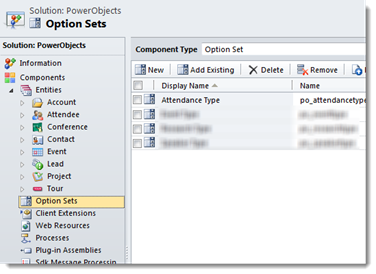
Create a Global Option Set for "Attendee Type" (Tour, Conference, Event)
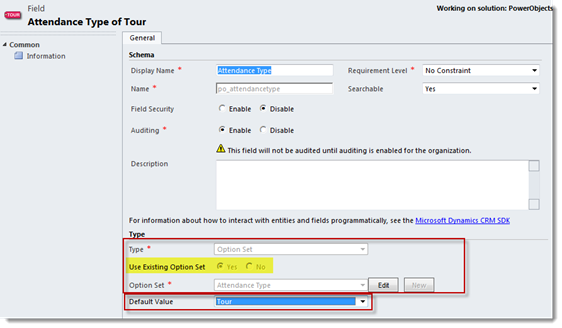
Create a new Option Set Field for each of the New Entities using the Global Option Set that you just created, with the default set to the correct Entity. (Example: Tours – Default Option Set Value: Tours – No Default set for the Attendee)
Add the new option set field to the CRM Form for each of the new Entities
Modify the Mappings for the new Entities to include the Attendee Type field. (This maps the Attendee type automatically each time a new Attendee is created)
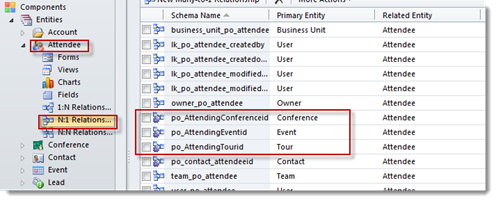

Relate the Attendee record to each of the new Event Types (Lookups on the Attendee record) -- In addition, relate the Attendee Record to the Contact entity (Lookup on the Attendee)
**Note: The reason we use a separate "Attendee" record vs. a direct relationship to the Contact, is to easily track the history of attendance for a specific Customer/Client. Additionally, we can add more information like: If they attended or not, what time they arrived, comments from a survey they took regarding the class…etc…All specific to this attendance record.(Metadata!)
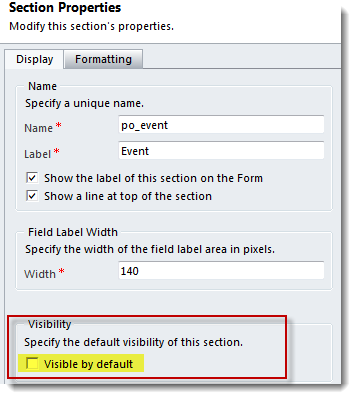
: Create new Sections on the Attendee Record, one for each of the Event Types. In the Section Properties, uncheck the "visible by default".
: CRM 2011 allows Administrators the ability to add the same Field to the Form multiple times. Since we are utilizing the "Attendee" record for more than one Event Entity, we can separate each of the lookups into separate sections and "un-hide" each section based on the type of record the Attendee record was created from. In the "Field Explorer" section on the right hand side of the Attendee Customization form, Uncheck the box that says "Only show unused fields". This will allow you to add the Contact to each of the newly created sections.

Since we mapped the value of the Attendee Type from the other Entities, we can now utilize a simple piece of Javascript that will run in the Onload event of the Attendee form. This script will Un-Hide the correct section based on the type of Attendance record that is being created.
**Remove all highlighted text before using code below
// ----------------------------------------------------------------------------------------------
// -- Hide fields based on the type of attendance record being created -------
// ----------------------------------------------------------------------------------------------
Create Function to call from OnLoad Event(below)
attendOnLoad = function() {
var eventtype = Xrm.Page.getAttribute("po_attendancetype");
Set Variable to get the attribute "Attendance Type" field (Above)
Create your If statements to get the value from your new variable(Below)
if (eventtype.getValue() == 1) //Event (1 = The Option Set Value of the Option selected)
{
Xrm.Page.ui.tabs.get("po_general").sections.get("po_event").setVisible(true);
Xrm.Page.ui.tabs.get("po_general").sections.get("po_tour").setVisible(false);
Xrm.Page.ui.tabs.get("po_general").sections.get("po_conference").setVisible(false);
Xrm.Page.ui.tabs.get("[Tab Schema Name]").sections.get("[Section Schema Name]").setVisible([true/false]);(Above)
}
if (eventtype.getValue() == 2) //Conference
{
Xrm.Page.ui.tabs.get("po_general").sections.get("po_event").setVisible(false);
Xrm.Page.ui.tabs.get("po_general").sections.get("po_tour").setVisible(false);
Xrm.Page.ui.tabs.get("po_general").sections.get("po_conference").setVisible(true);
}
if (eventtype.getValue() == 3) //tour
{
Xrm.Page.ui.tabs.get("po_general").sections.get("po_event").setVisible(false);
Xrm.Page.ui.tabs.get("po_general").sections.get("po_tour").setVisible(true);
Xrm.Page.ui.tabs.get("po_general").sections.get("po_conference").setVisible(false);
}
if (eventtype.getValue() == null) //Empty
{
Xrm.Page.ui.tabs.get("po_general").sections.get("po_event").setVisible(true);
Xrm.Page.ui.tabs.get("po_general").sections.get("po_tour").setVisible(true);
Xrm.Page.ui.tabs.get("po_general").sections.get("po_conference").setVisible(true);
}
}
End Result:
This is obviously just an example that can easily be expanded upon, but hopefully enough to wet some whistles and show how easy it can be to add new functionality to your CRM 2011 Organization! If you need help or are looking for a great CRM partner to work with reach out to the CRM Experts at PowerObjects.
Happy CRMing!


